An inexpensive entry into the realm of serious flight simulation based on Xbox Series S and custom-built peripherals.
Ever since I bought my first PC, a Compaq 386, at a garage sale in the late 1990s, I have been fascinated by technology and the desire to understand it never waned. Looking over all these years, apart from my fascination with programming, there is one constant that kept me mesmerised one way or another, and that is flight simulation.
Starting with Microsoft Flight Simulator 3.0 to 5.0, which were already outdated at that time, to titles like Digital Integration's Tornado, a technical masterpiece (!), and MicroProse's Falcon series, I have always somehow stuck to this genre.
Years later I ended up with a full Saitek Cessna Pro Flight rig
and X-Plane 9. The simulator never ran particularly well on my
PC, but in the end I didn't care.
Eventually the hobby fell by the wayside again. My own family
plans came to the fore, so in the end I had the "glorious” idea of
selling all my equipment on eBay and buy a Switch Lite. Yes, you
read that right. I simply didn't have the time or availability,
so the equipment ended up gathering dust and taking up the space I
didn't have.
Looking back, it was a very wise decision and I don't regret it. Sure, in the years that followed, I always felt like taking up the hobby again, but in the end it was very relieving to get rid of all the junk in my life.
However, as one would expect, I recently felt the need to pick it up again. But where do I start? A powerful PC is expensive and so is flight simulation equipment. Moreover, I would fall back into old patterns by bringing more stuff into my life, things that I really didn’t want anymore. That was definitely not an option.
After a bit of research, I quickly realised that my best option was to buy a second-hand Xbox Series S and Microsoft’s Flight Simulator; the price was simply unbeatable!
But how does flight simulation fare on the Xbox platform, especially if you are seriously interested in the subject matter? While researching various online communities, I quickly came across the narrative that the Xbox is only a good entry point into the realm of flight simulation, a way to pick up the casual gamer and prepare them for more.
It is after all, a closed, proprietary system with limited hardware compatibility and fewer options for customisation than a traditional PC. If you are serious about the hobby, the narrative goes that the only logical step you can take is to get a full-fledged gaming PC. As already mentioned, I certainly didn’t want that!
I mean, after all, it's the same software, just on a different platform, right? How hard can it be? That was the moment I decided to do what I do best: build it myself! This article is all about showing you, the reader, the enthusiast, the gamer, what can be done, and how I upcycled defective hardware to get it working on my Xbox Series S.
At the very beginning, the main question I asked myself was which choices I had for communicating with the Xbox. It was certainly not an option to convert an Xbox controller or to adapt compatible flight simulation input devices to my preferences. This would have been expensive, unnecessarily complicated and time-consuming, however, it seemed possible to connect a keyboard and mouse. Perfect!
After all, a keyboard is nothing more than a standardised input device, so it is reasonable to assume that HIDThe USB human interface device class (USB HID class) is a part of the USB specification for computer peripherals: it specifies a device class (a type of computer hardware) for human interface devices such as keyboards, mice, game controllers and alphanumeric display devices. input devices would be detected by the Xbox.
It was worth a shot! I briefly tried to program a microcontroller so that it would be recognised as an HID keyboard and continuously sending keystrokes to the host connected to it. When everything worked on my laptop, I connected the device to my Xbox and lo and behold, it worked!
In a nutshell, HID devices are ideal for this project and are infinitely more flexible thanks to microcontrollers. This even works if you connect a regular keyboard in parallel. Time to get started!
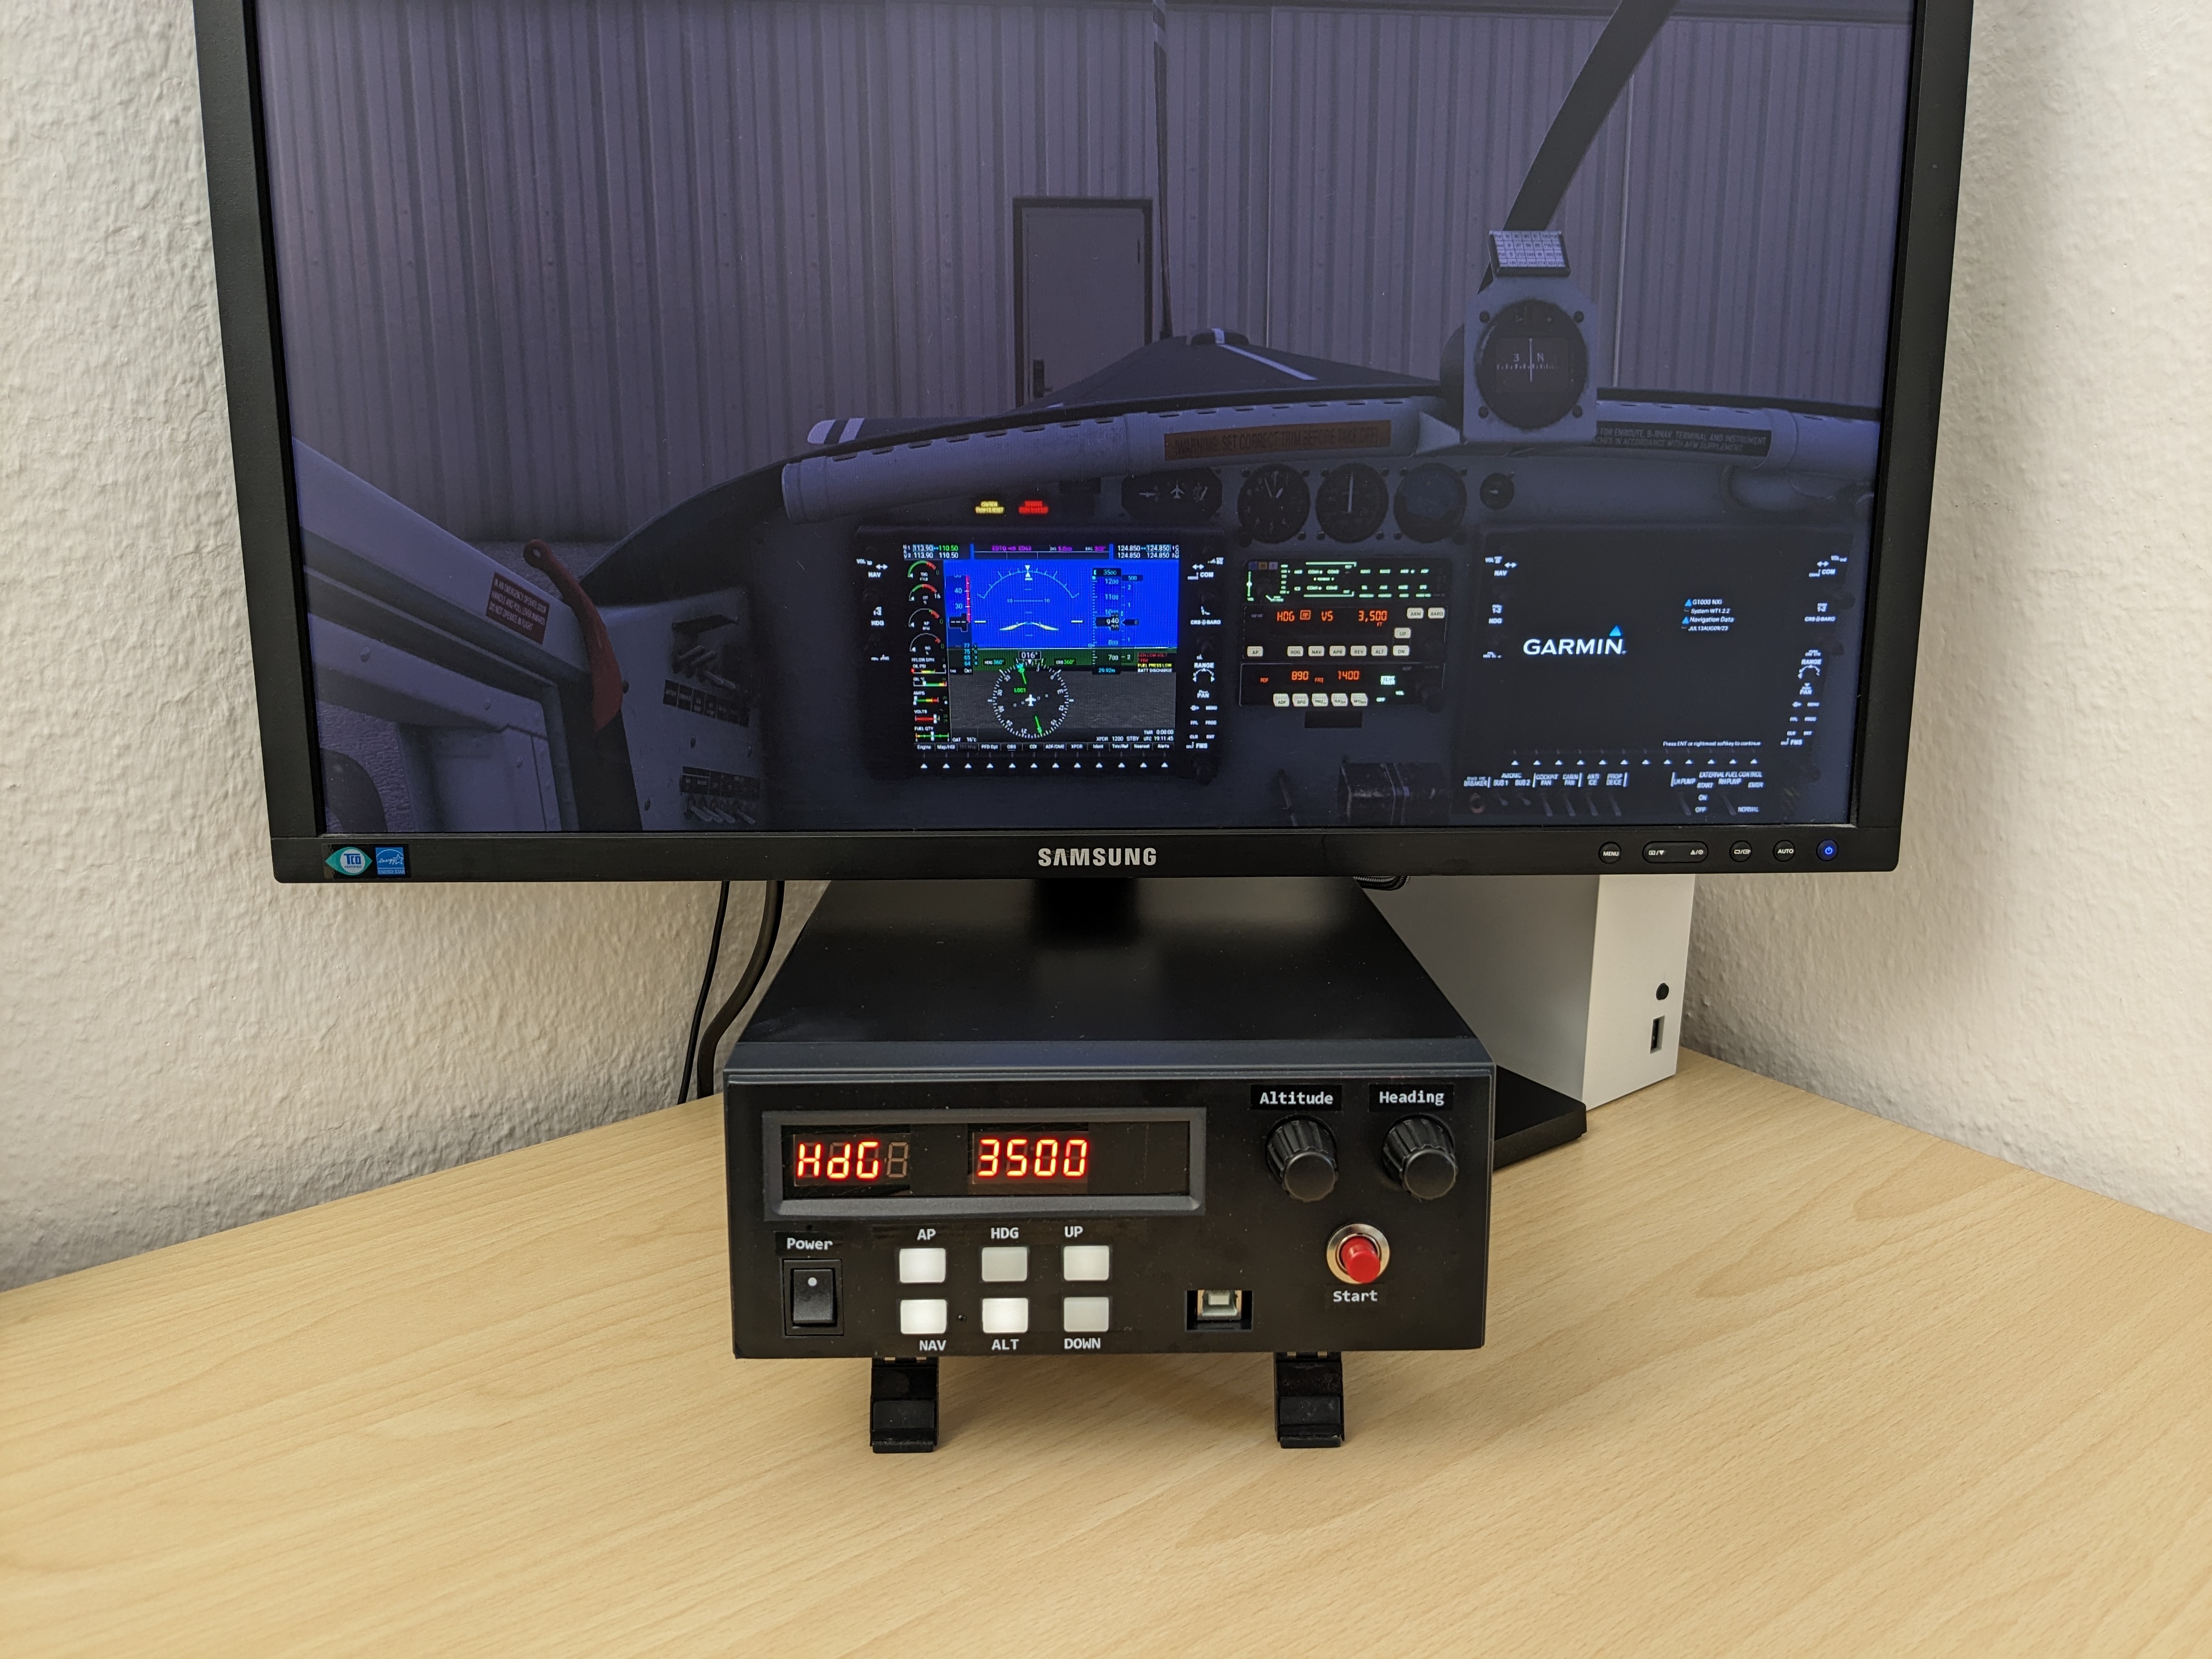
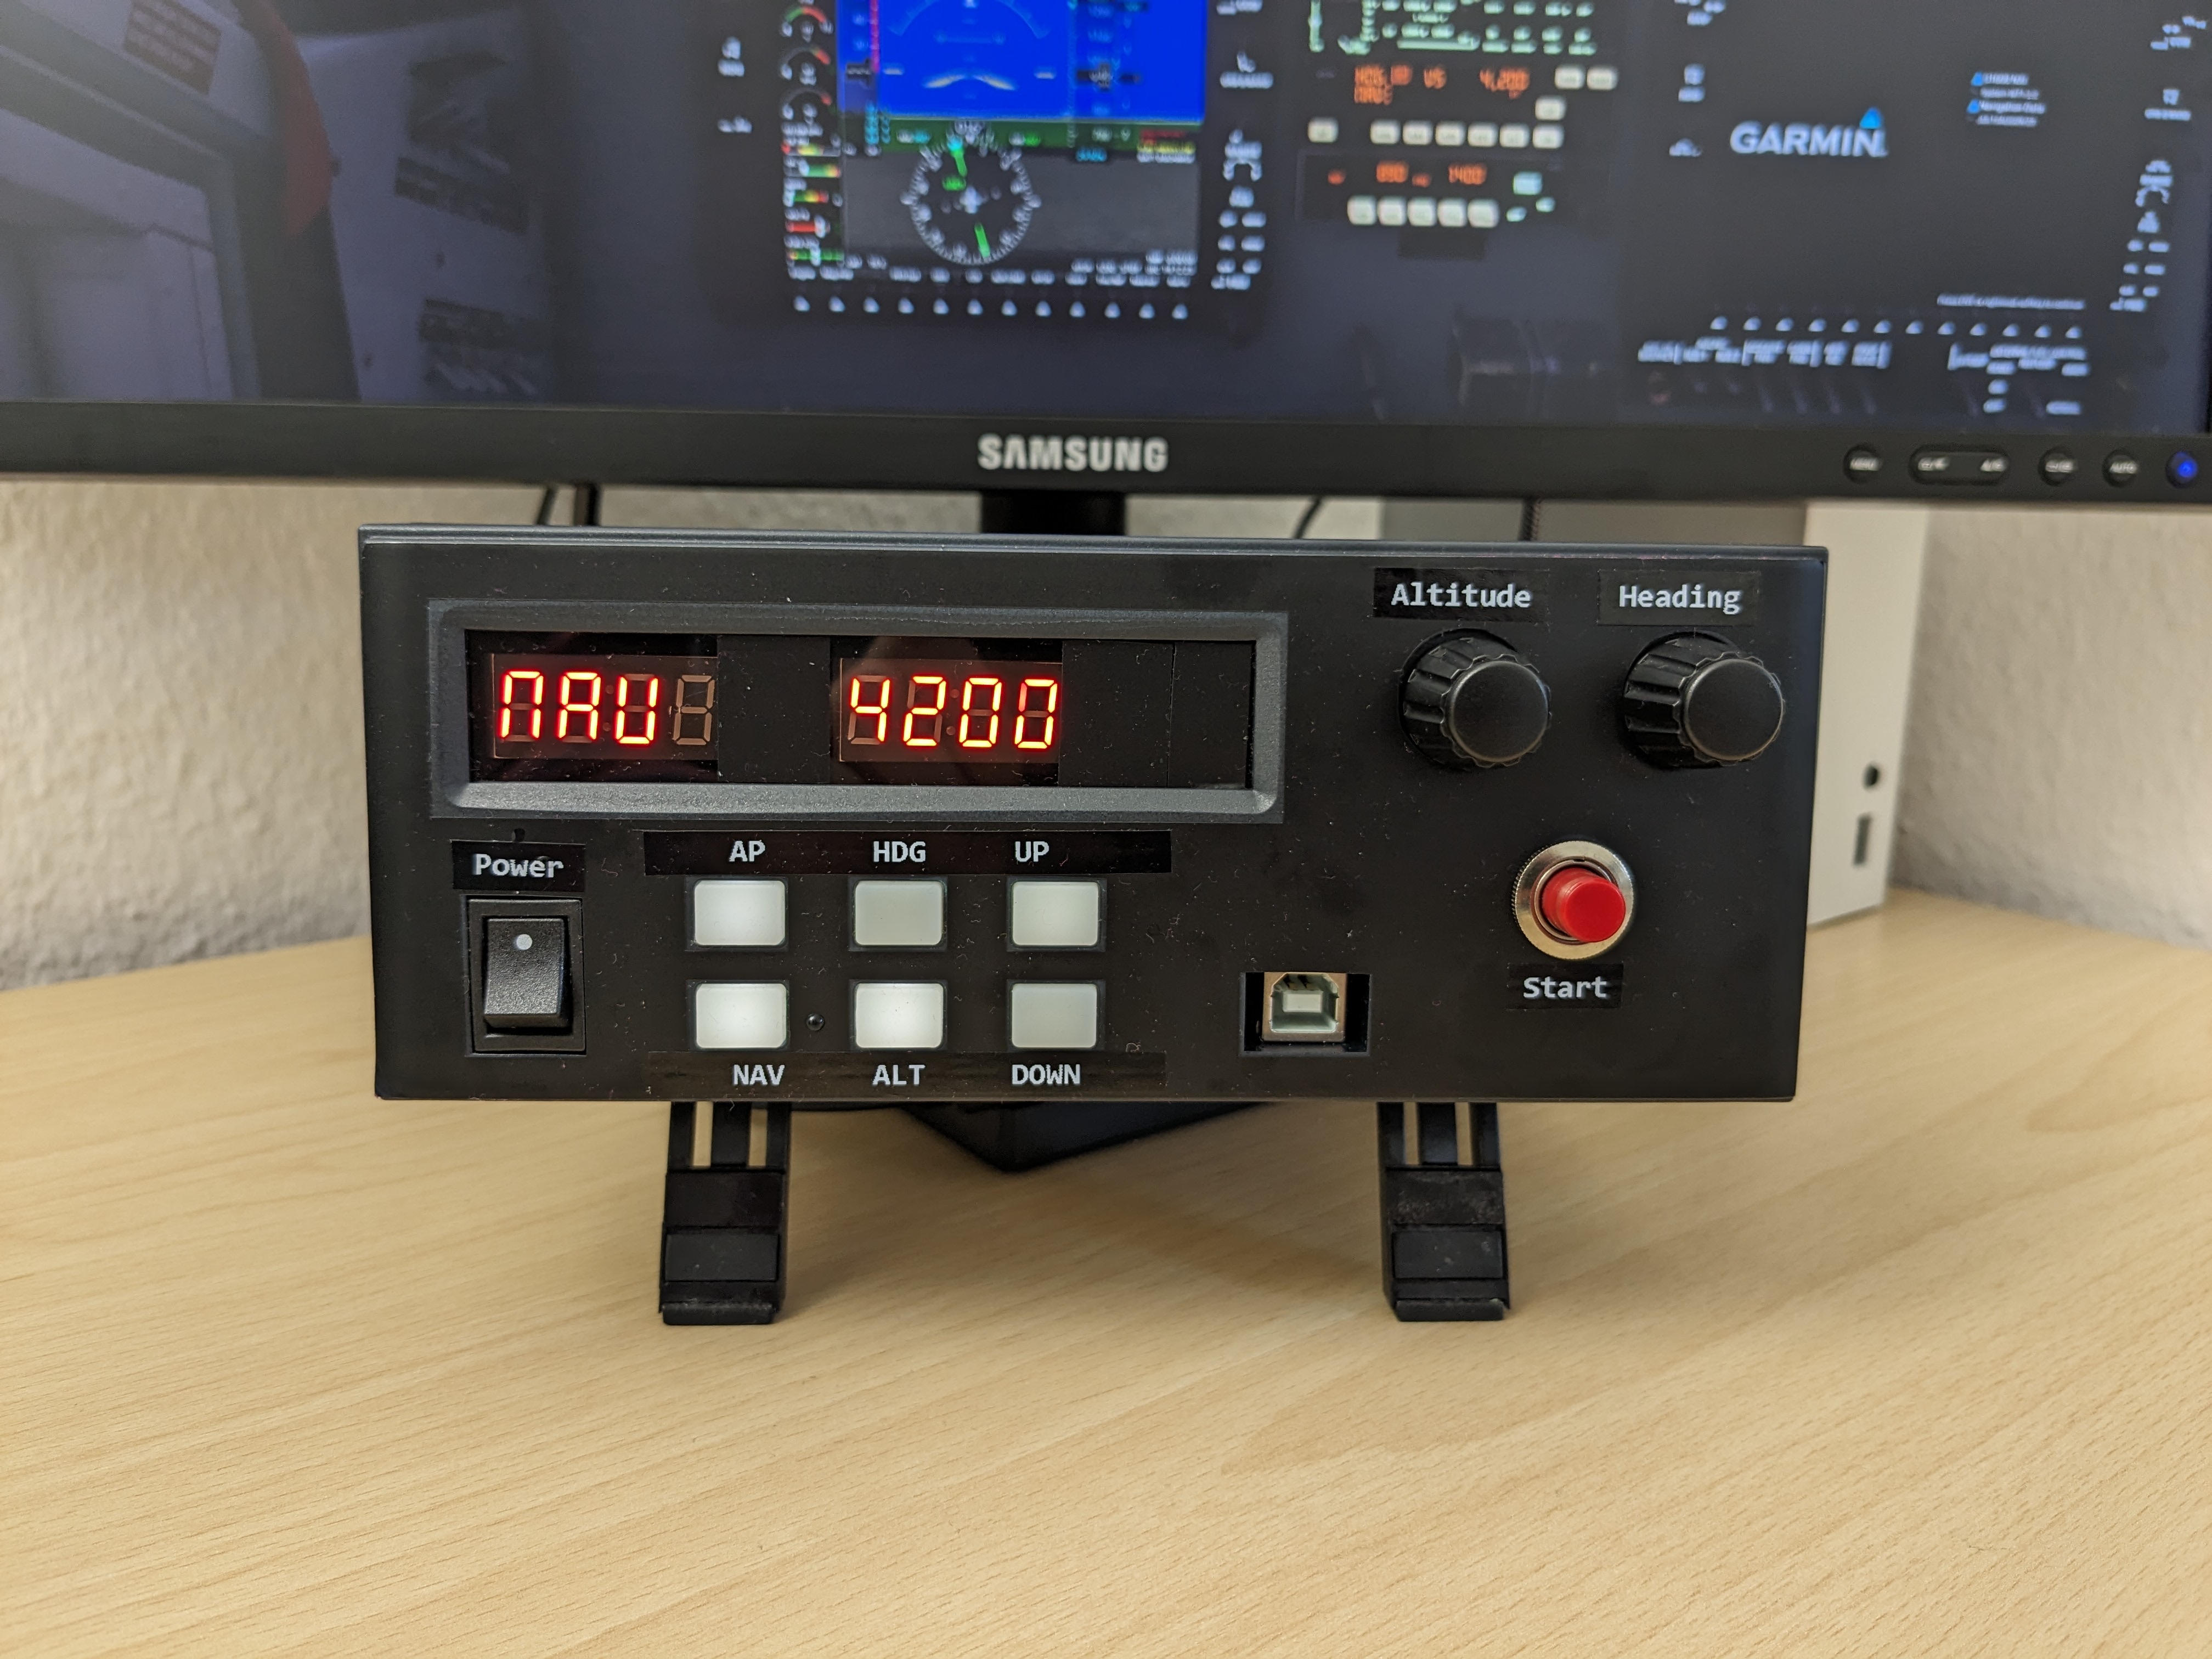
One of the most important instruments in an aircraft is the autopilot. Sure, it's fun to fly an aircraft by hand, but in a simulated environment you want to be able to navigate, regardless of weather or visibility. In addition, monitoring individual systems can become a complex task, especially if you don't have a co-pilot who can take care of it, hence the autopilot function is very helpful and its use is also entirely realistic.
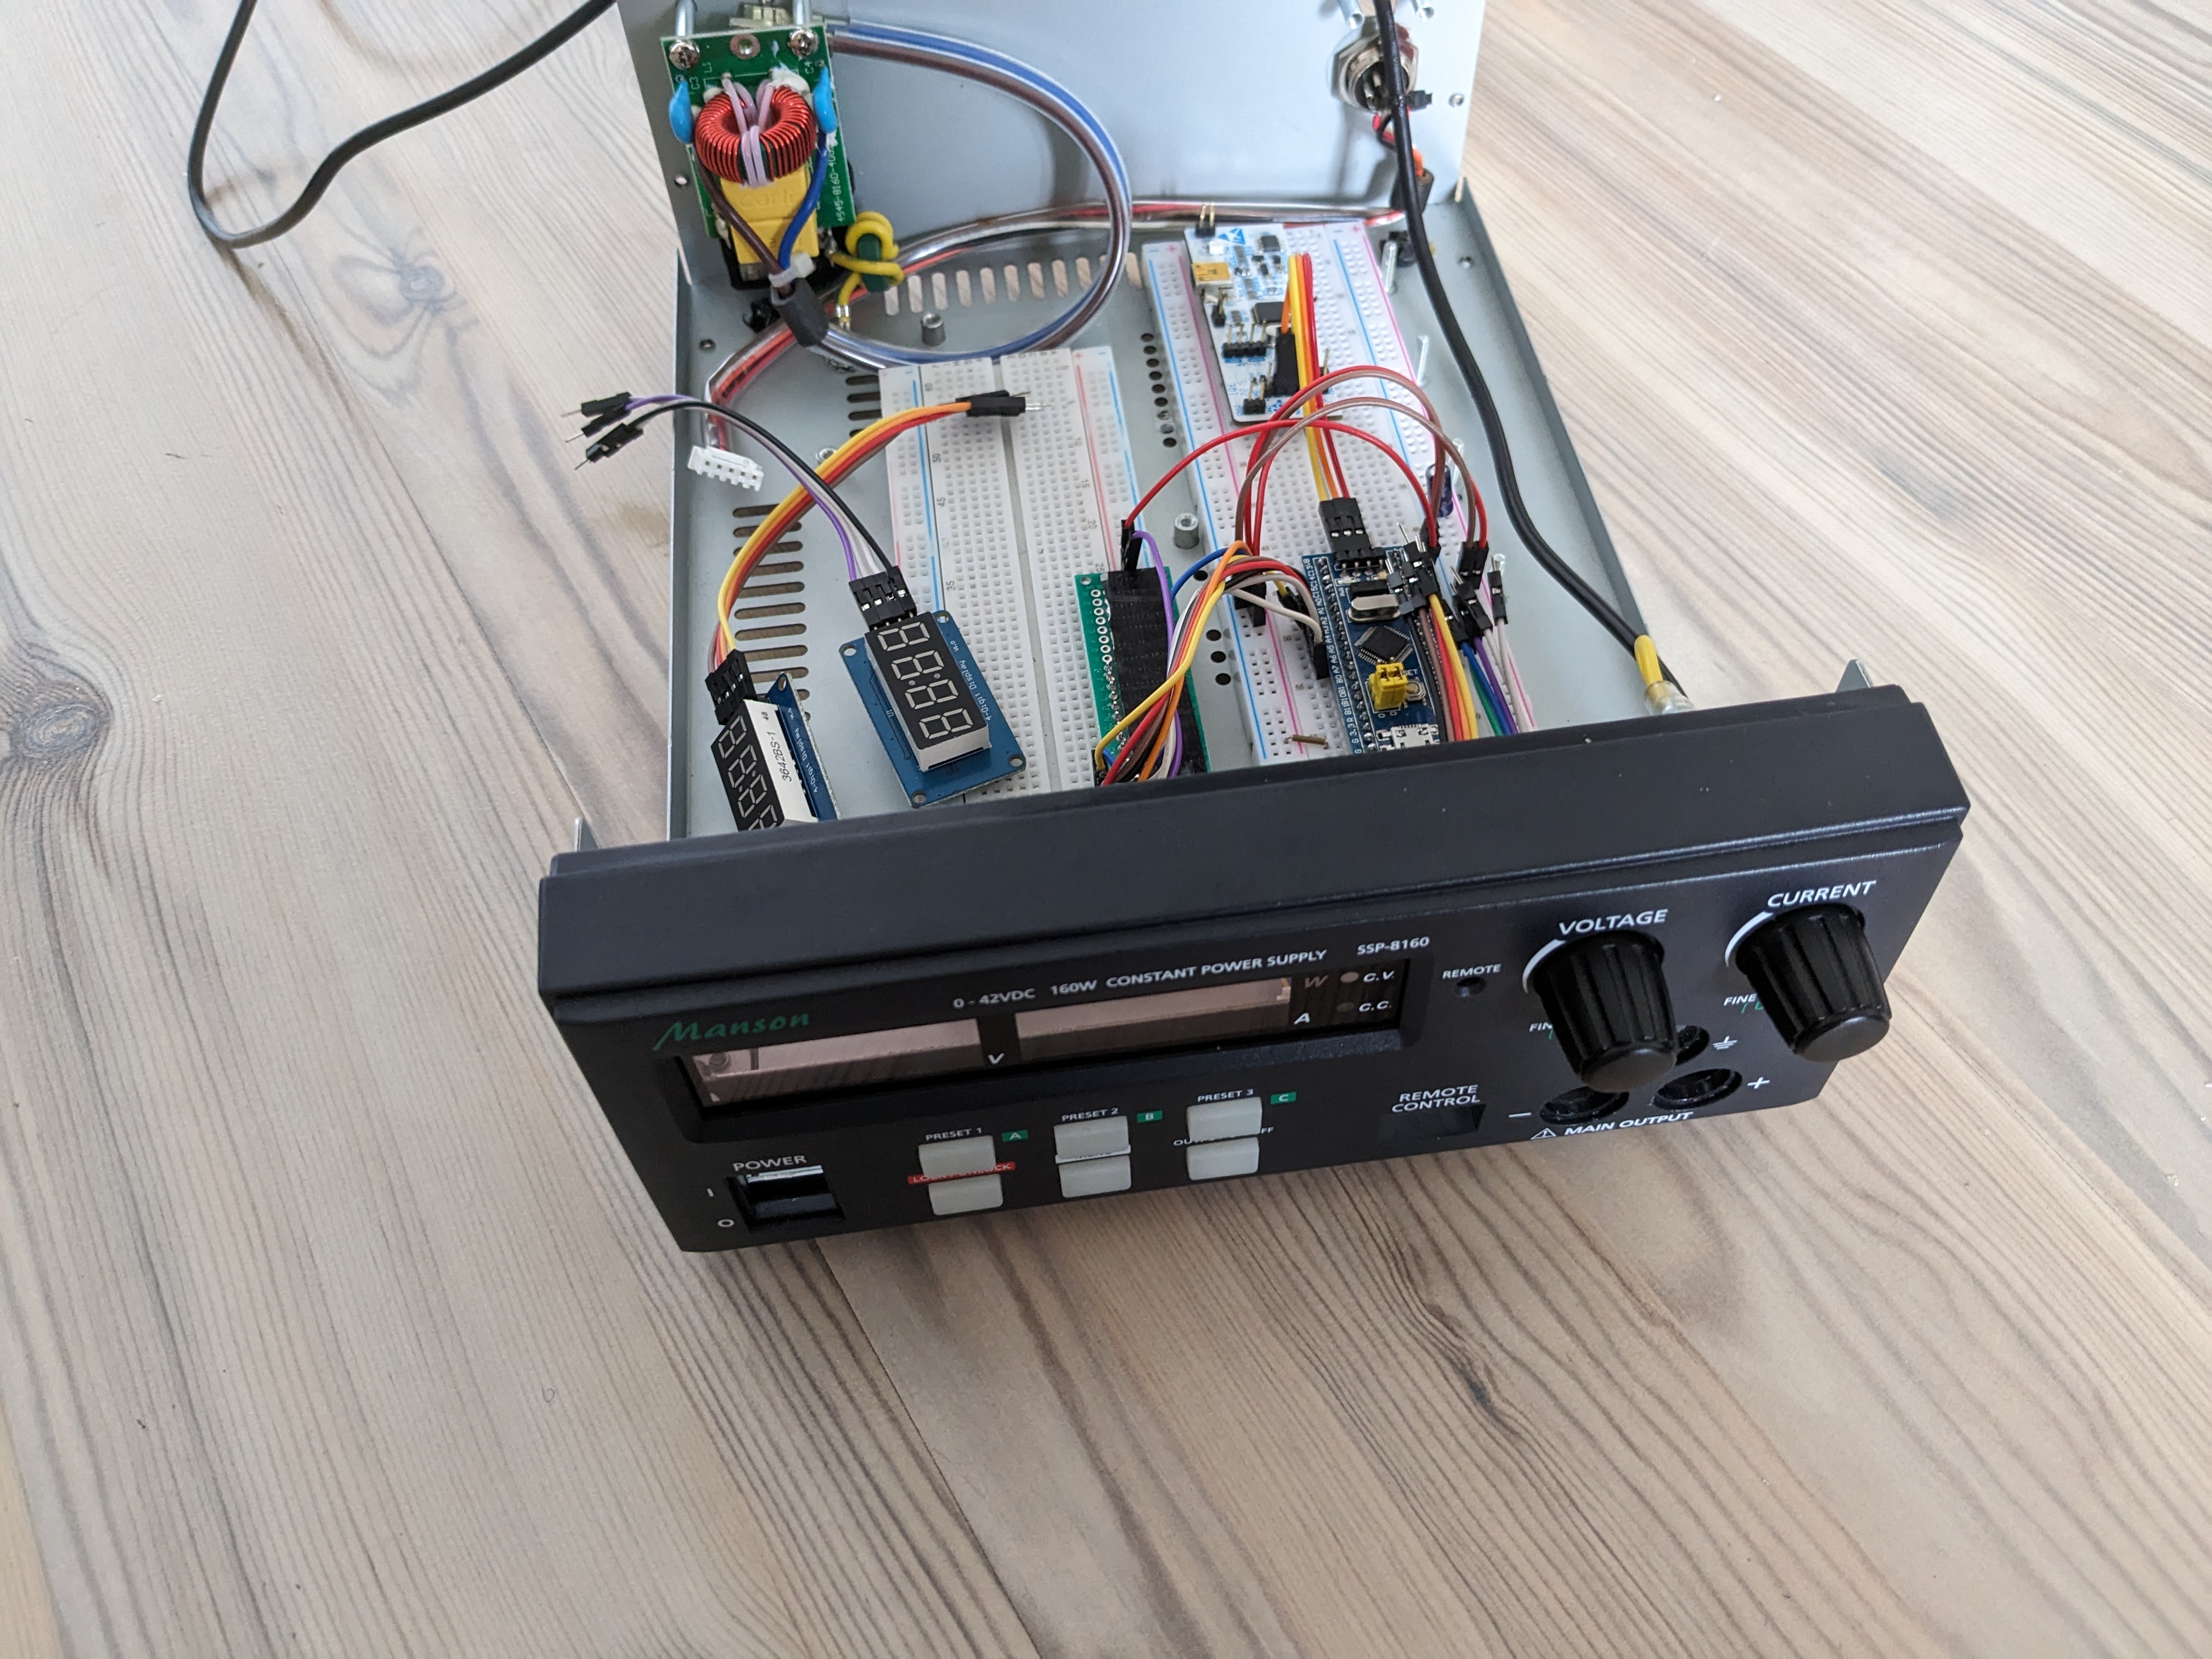
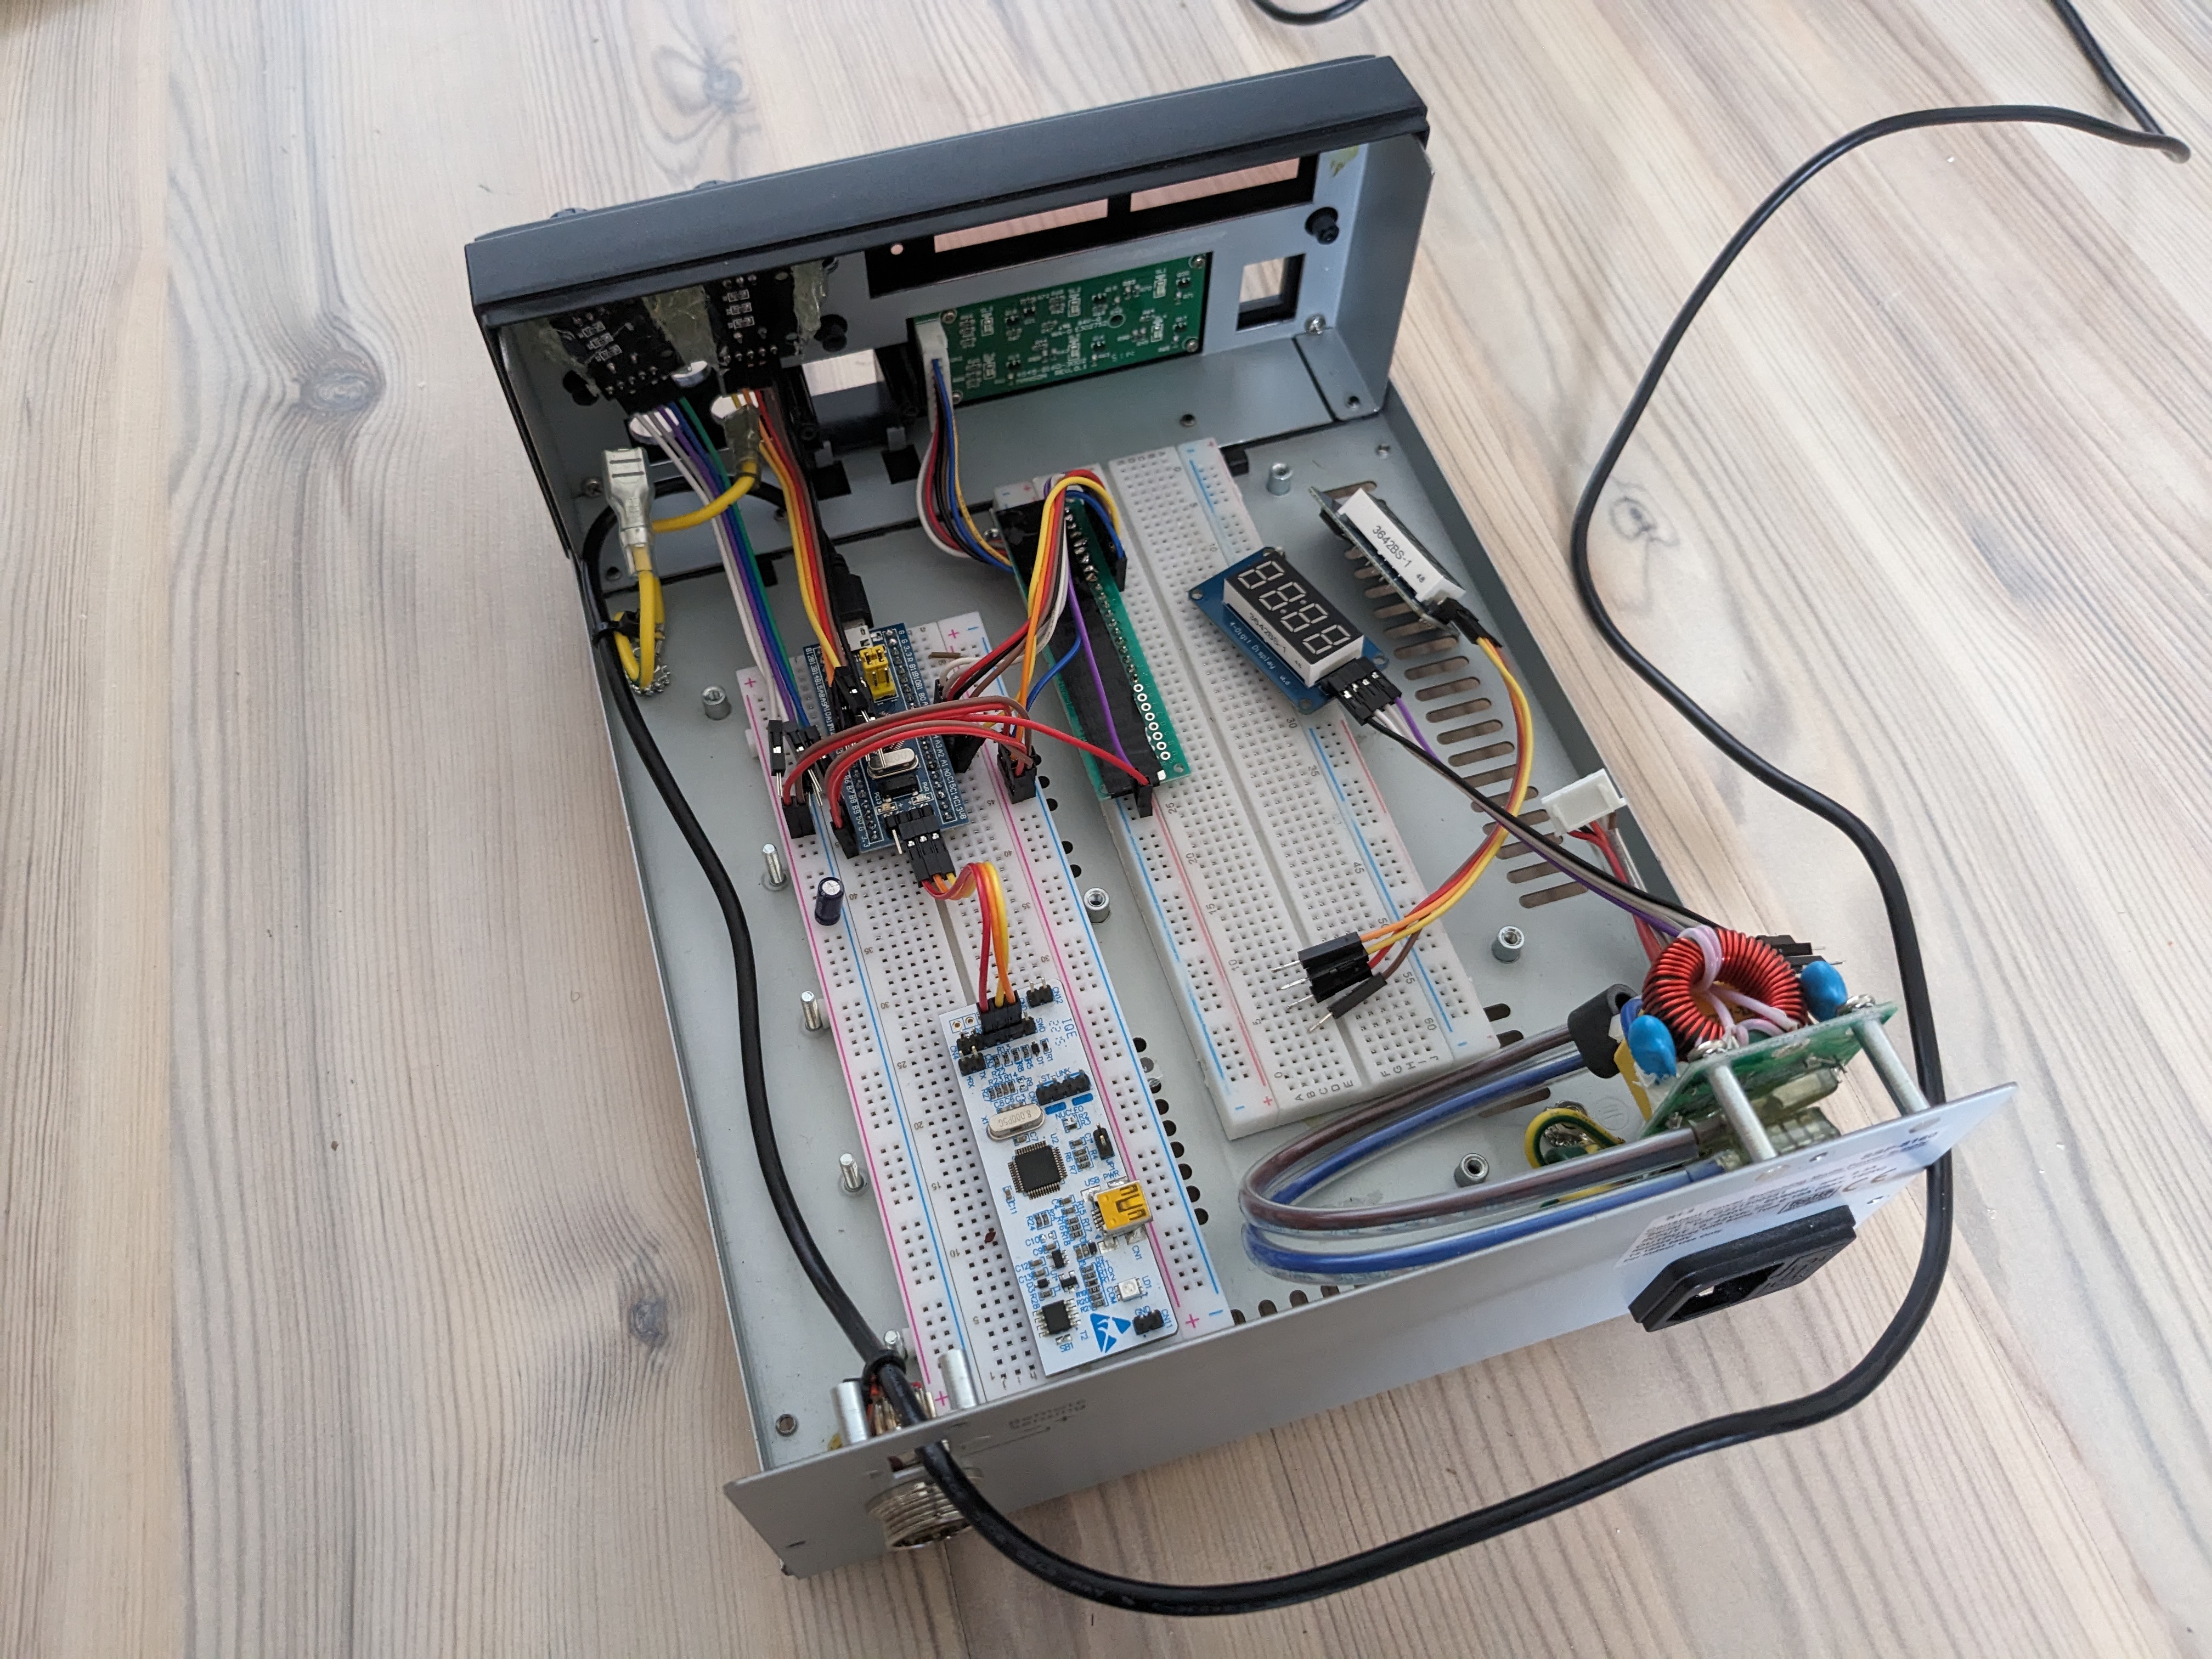
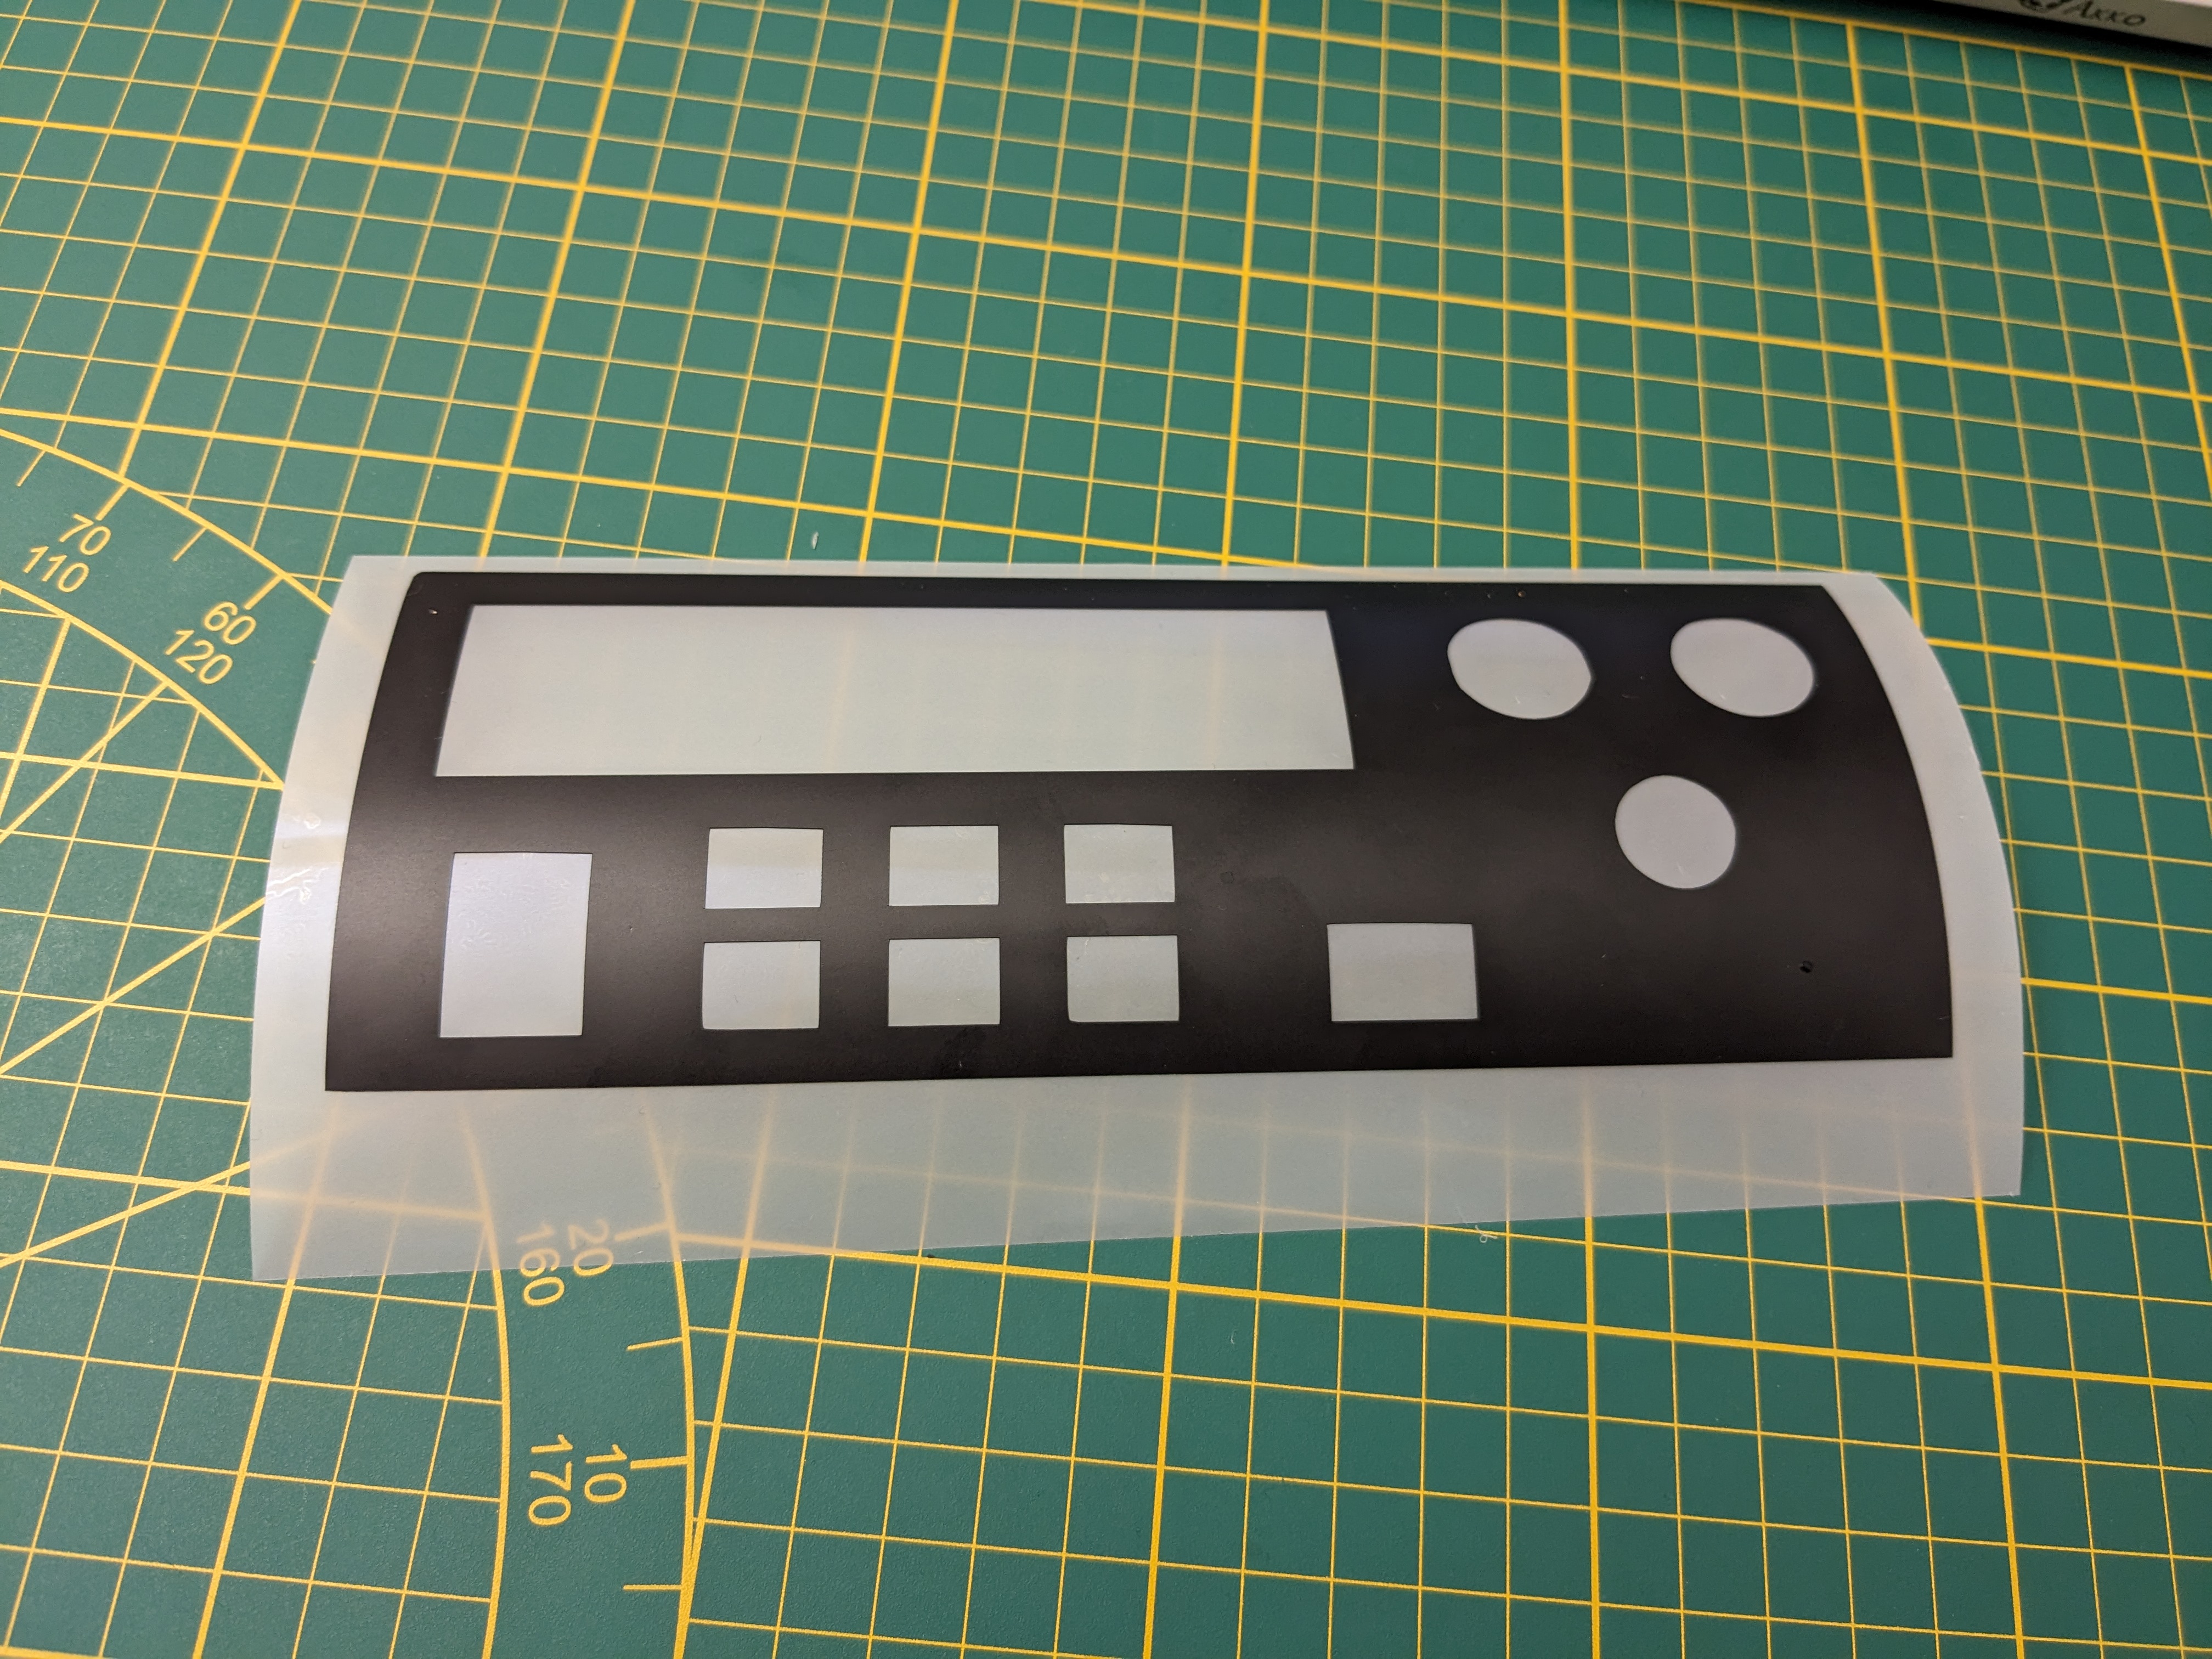
For this reason, I converted a defective Manson SSP-8160 laboratory power supply. I gutted most of it and fitted it with an STM32F103 Blue Pill microcontroller board. I replaced the 7-segment displays with TM1637-based equivalents, attached new rotary encoders and only reused the original key matrix and main power switch.
The design is roughly based on the KAP 140 autopilot system from Bendix/King, which is used in many aircrafts, including my personal favorite, the Pilatus PC-6 Turbo-Porter.

The boot-up phase and the behavior of the firmware is modelled after the version used by the Pilatus Porter PC-6 by Blackbird Simulations. In addition, since there is no way to read data back from the simulator, there is also the option to change the state of the device without sending keystrokes to the Xbox. This is very useful when the simulator and the device are out of sync. This is rarely necessary, but it does happen.
HID-FCU, basic usage. Download: webm
Thanks to a custom keyboard profile, the operation is surprisingly pleasant. The entire autopilot, including vertical and lateral navigation, works flawlessly and the haptics provide perfect immersion. It makes a huge difference whether operating the autopilot virtually, or configuring it manually, as if you were sitting right in the cockpit. I have already successfully completed several flights using it, with hardly any difficulties worth mentioning.
HID-FCU, lateral and vertical navigation. Download: webm
Overall, the whole project is very much tailored to my individual needs, and without further customization, an exact replica would probably not make much sense, especially since it is quite undocumented. Nevertheless, it provides a fairly stable basis for designing your own hardware. For this reason I have uploaded the complete source code to GitHub: Xbox-Flight-Simulation-Rig
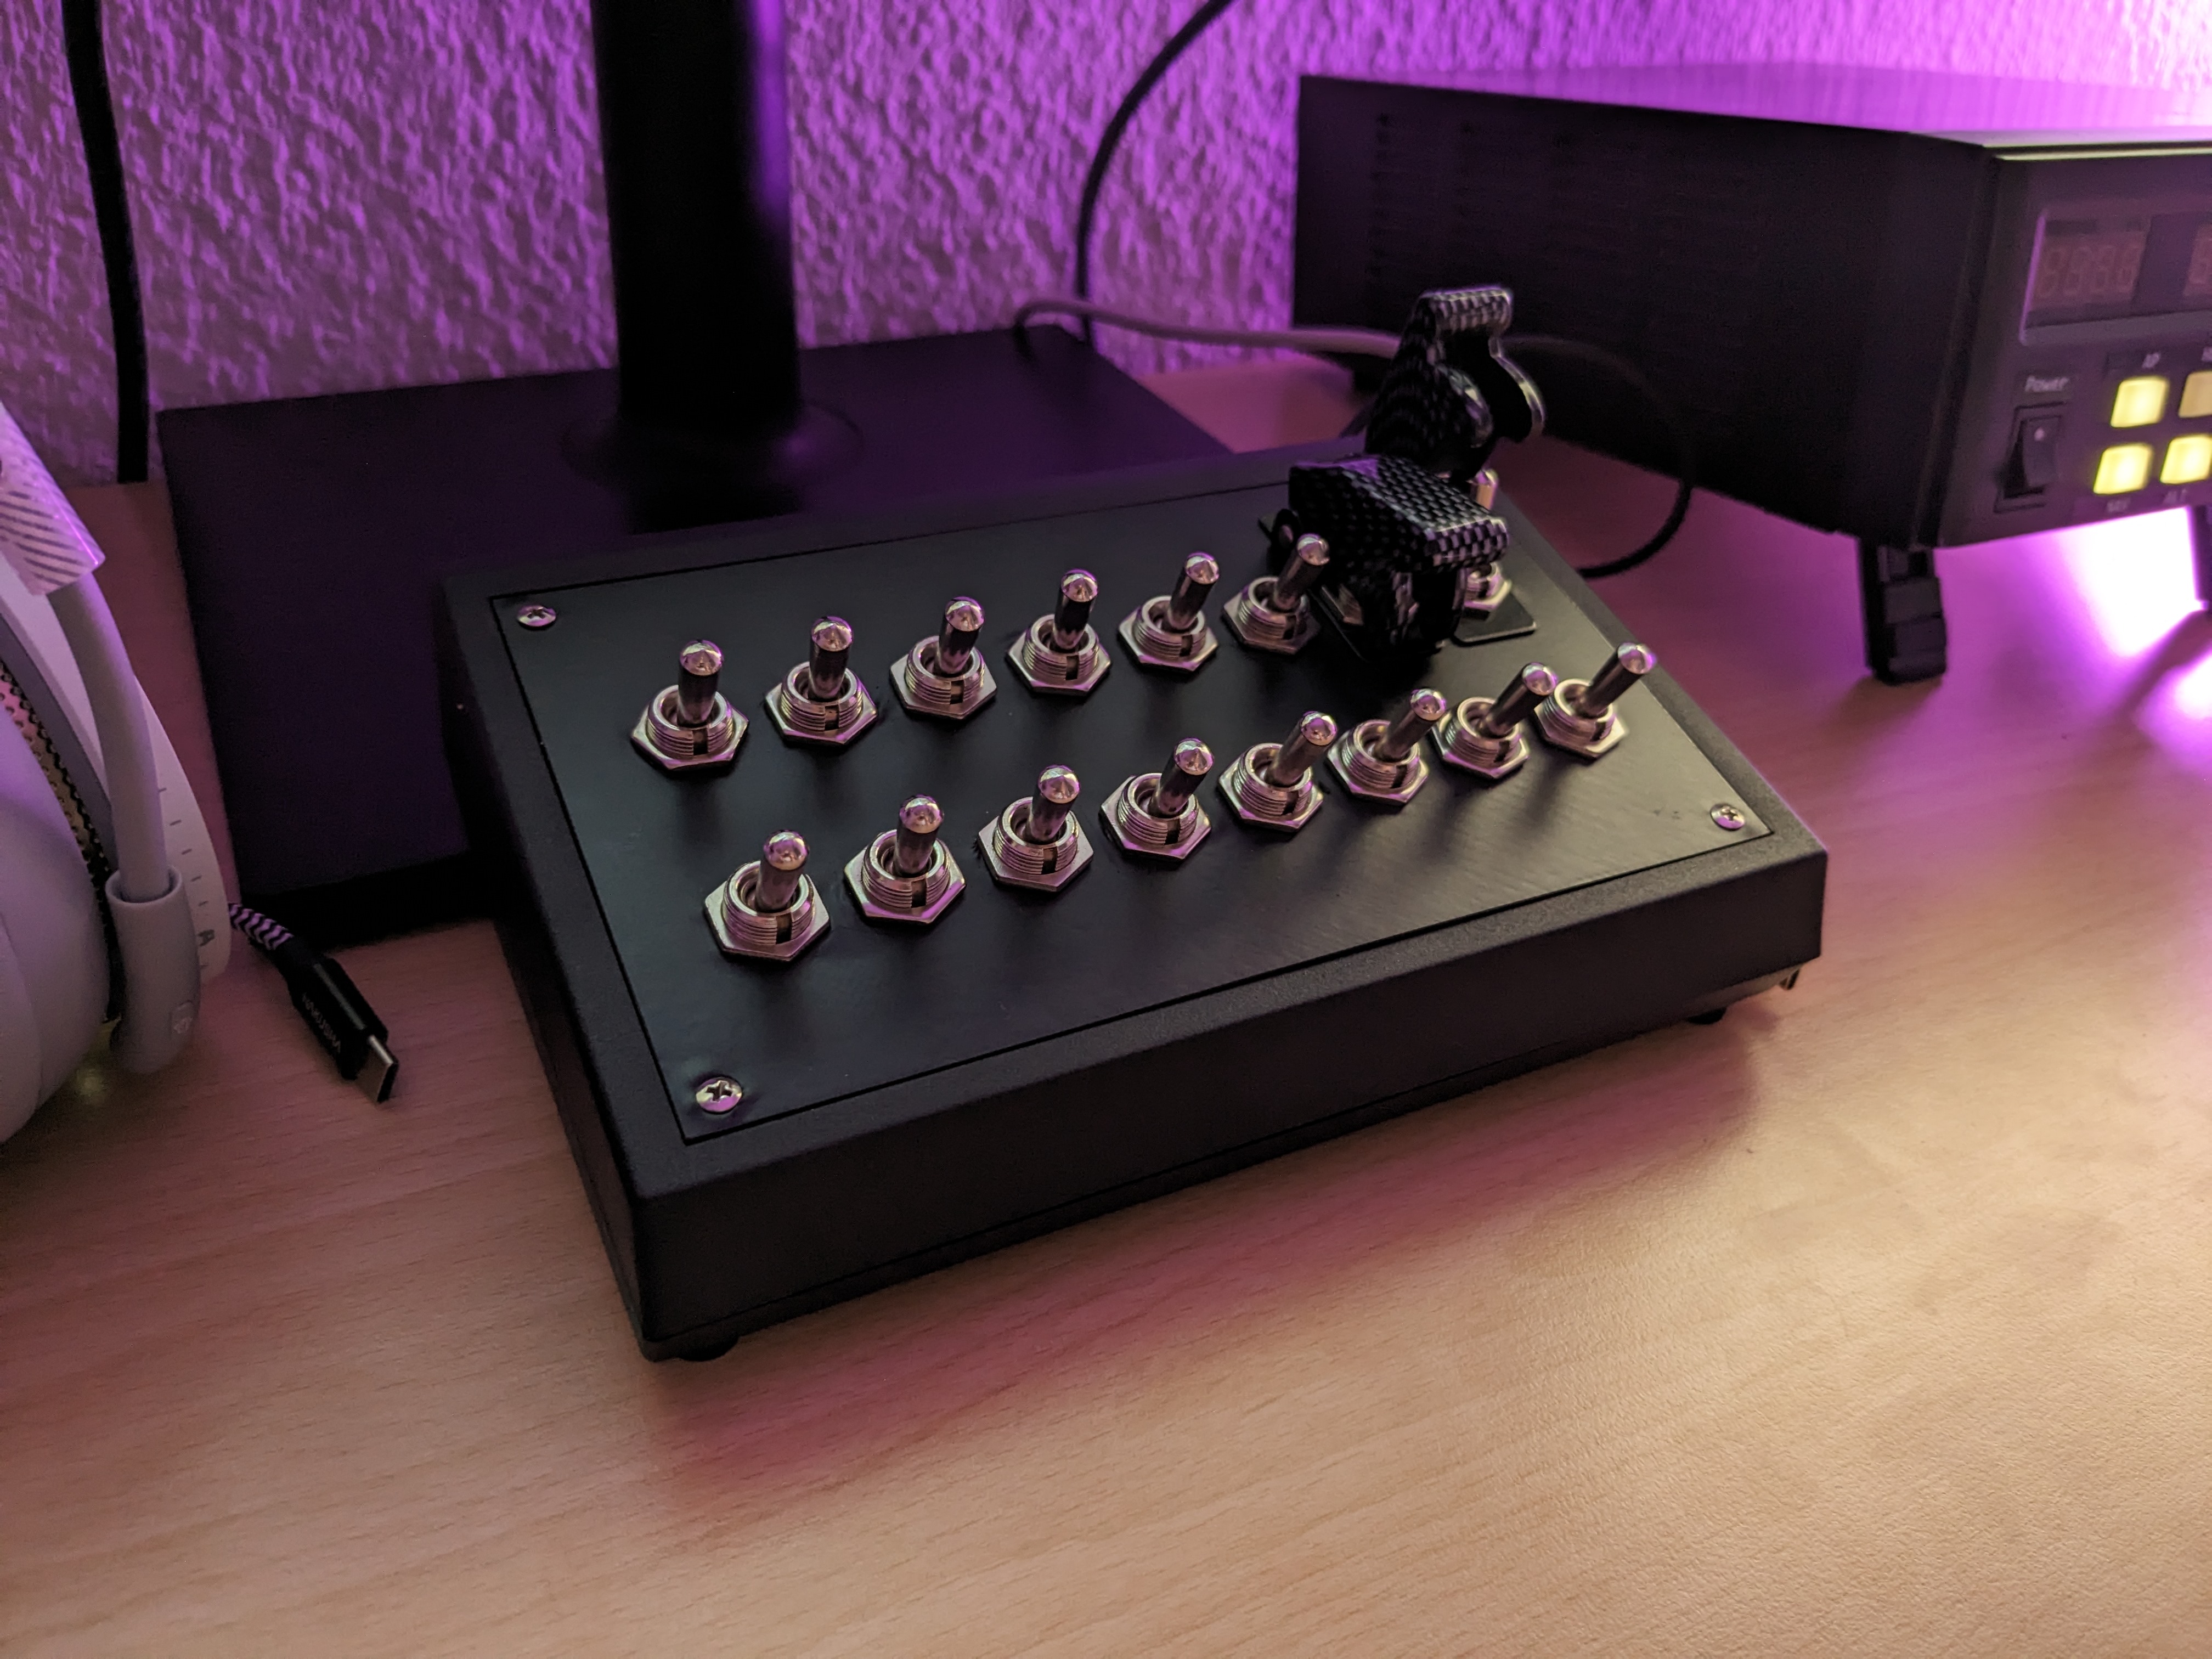
Anyone who has ever sat in a cockpit or is simply interested in aviation knows this: without switches, an airplane is not an airplane. They are part of it, they serve a purpose, and where there is one, there are generally plenty more. The Pilatus PC-6 is no exception. For this reason, it was only logical to design a switch panel.
I set myself the following goals:
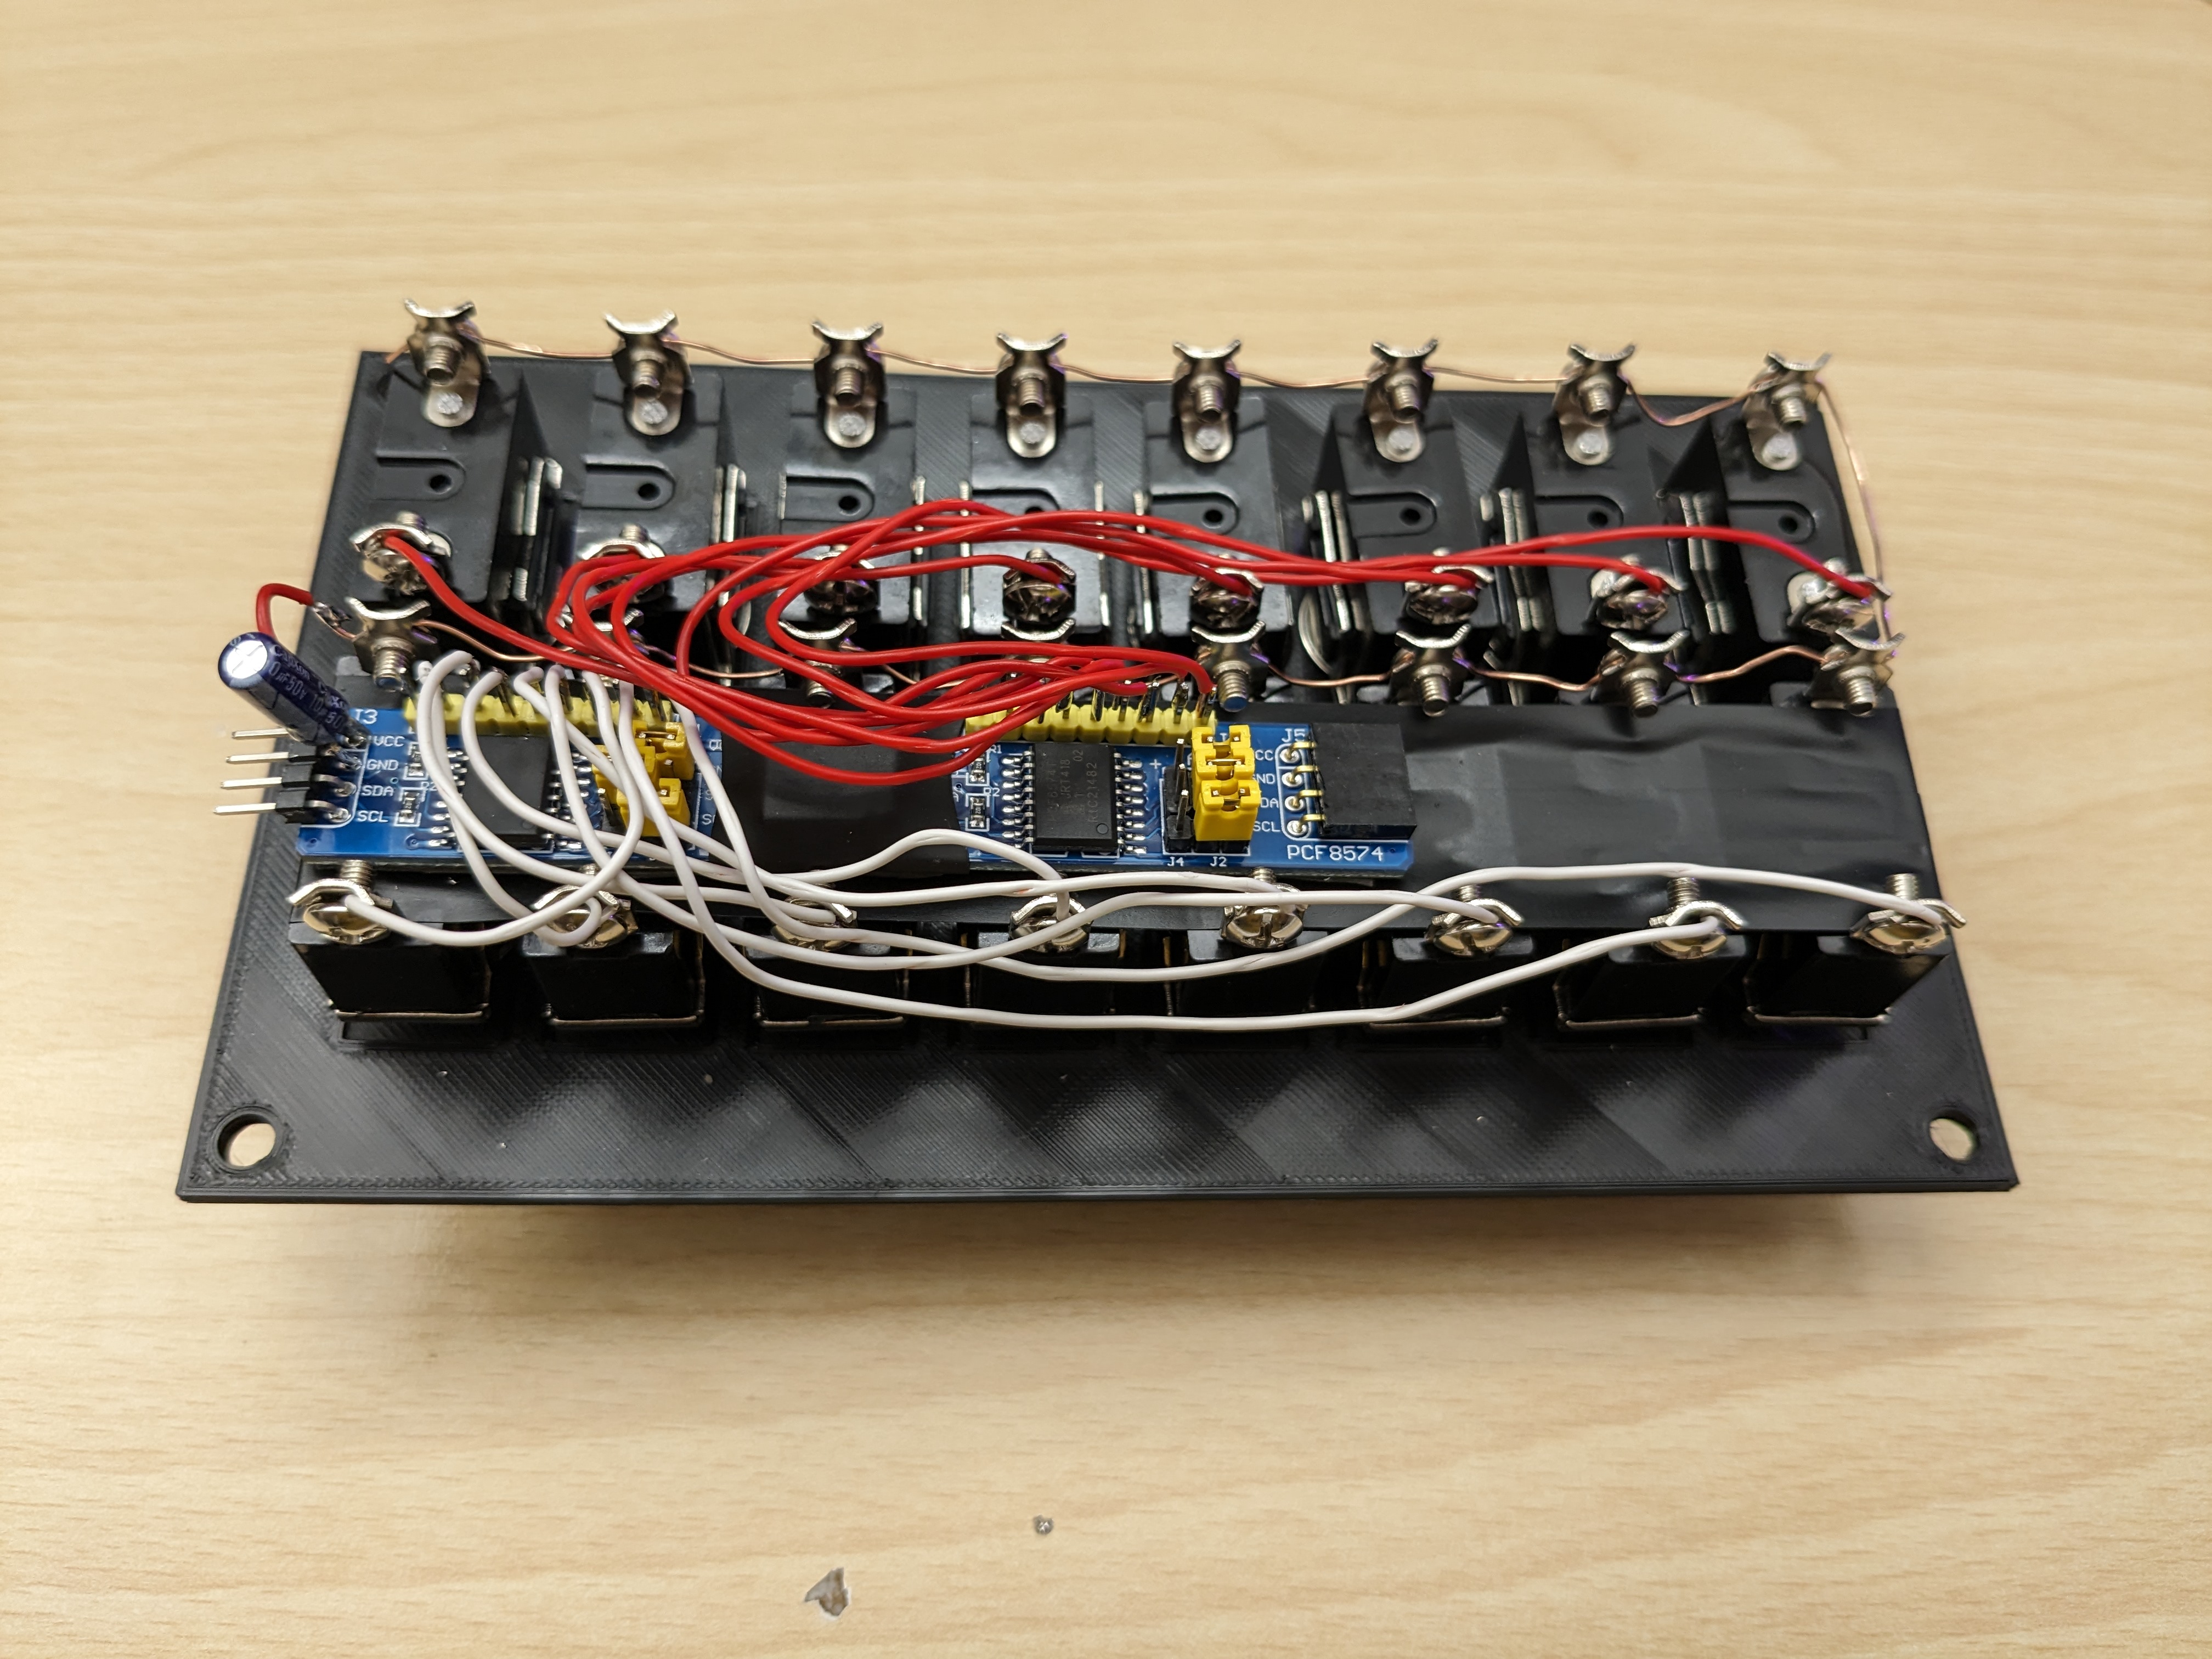
The first problem to be solved was the number of switches. I didn't want to waste 16 GPIO pins on the microcontroller, if I even had that many available. Besides, that would have become a problem as well, since I wanted to connect the panel to the autopilot using a cable.
I found a simple solution and decided to use the PCF8574 8-bit I/O Expander for I²C Bus. This chip is cheaply available as a readily assembled module. These modules can be connected in series to control up to 64 GPIO pins per I²C bus. Perfect!
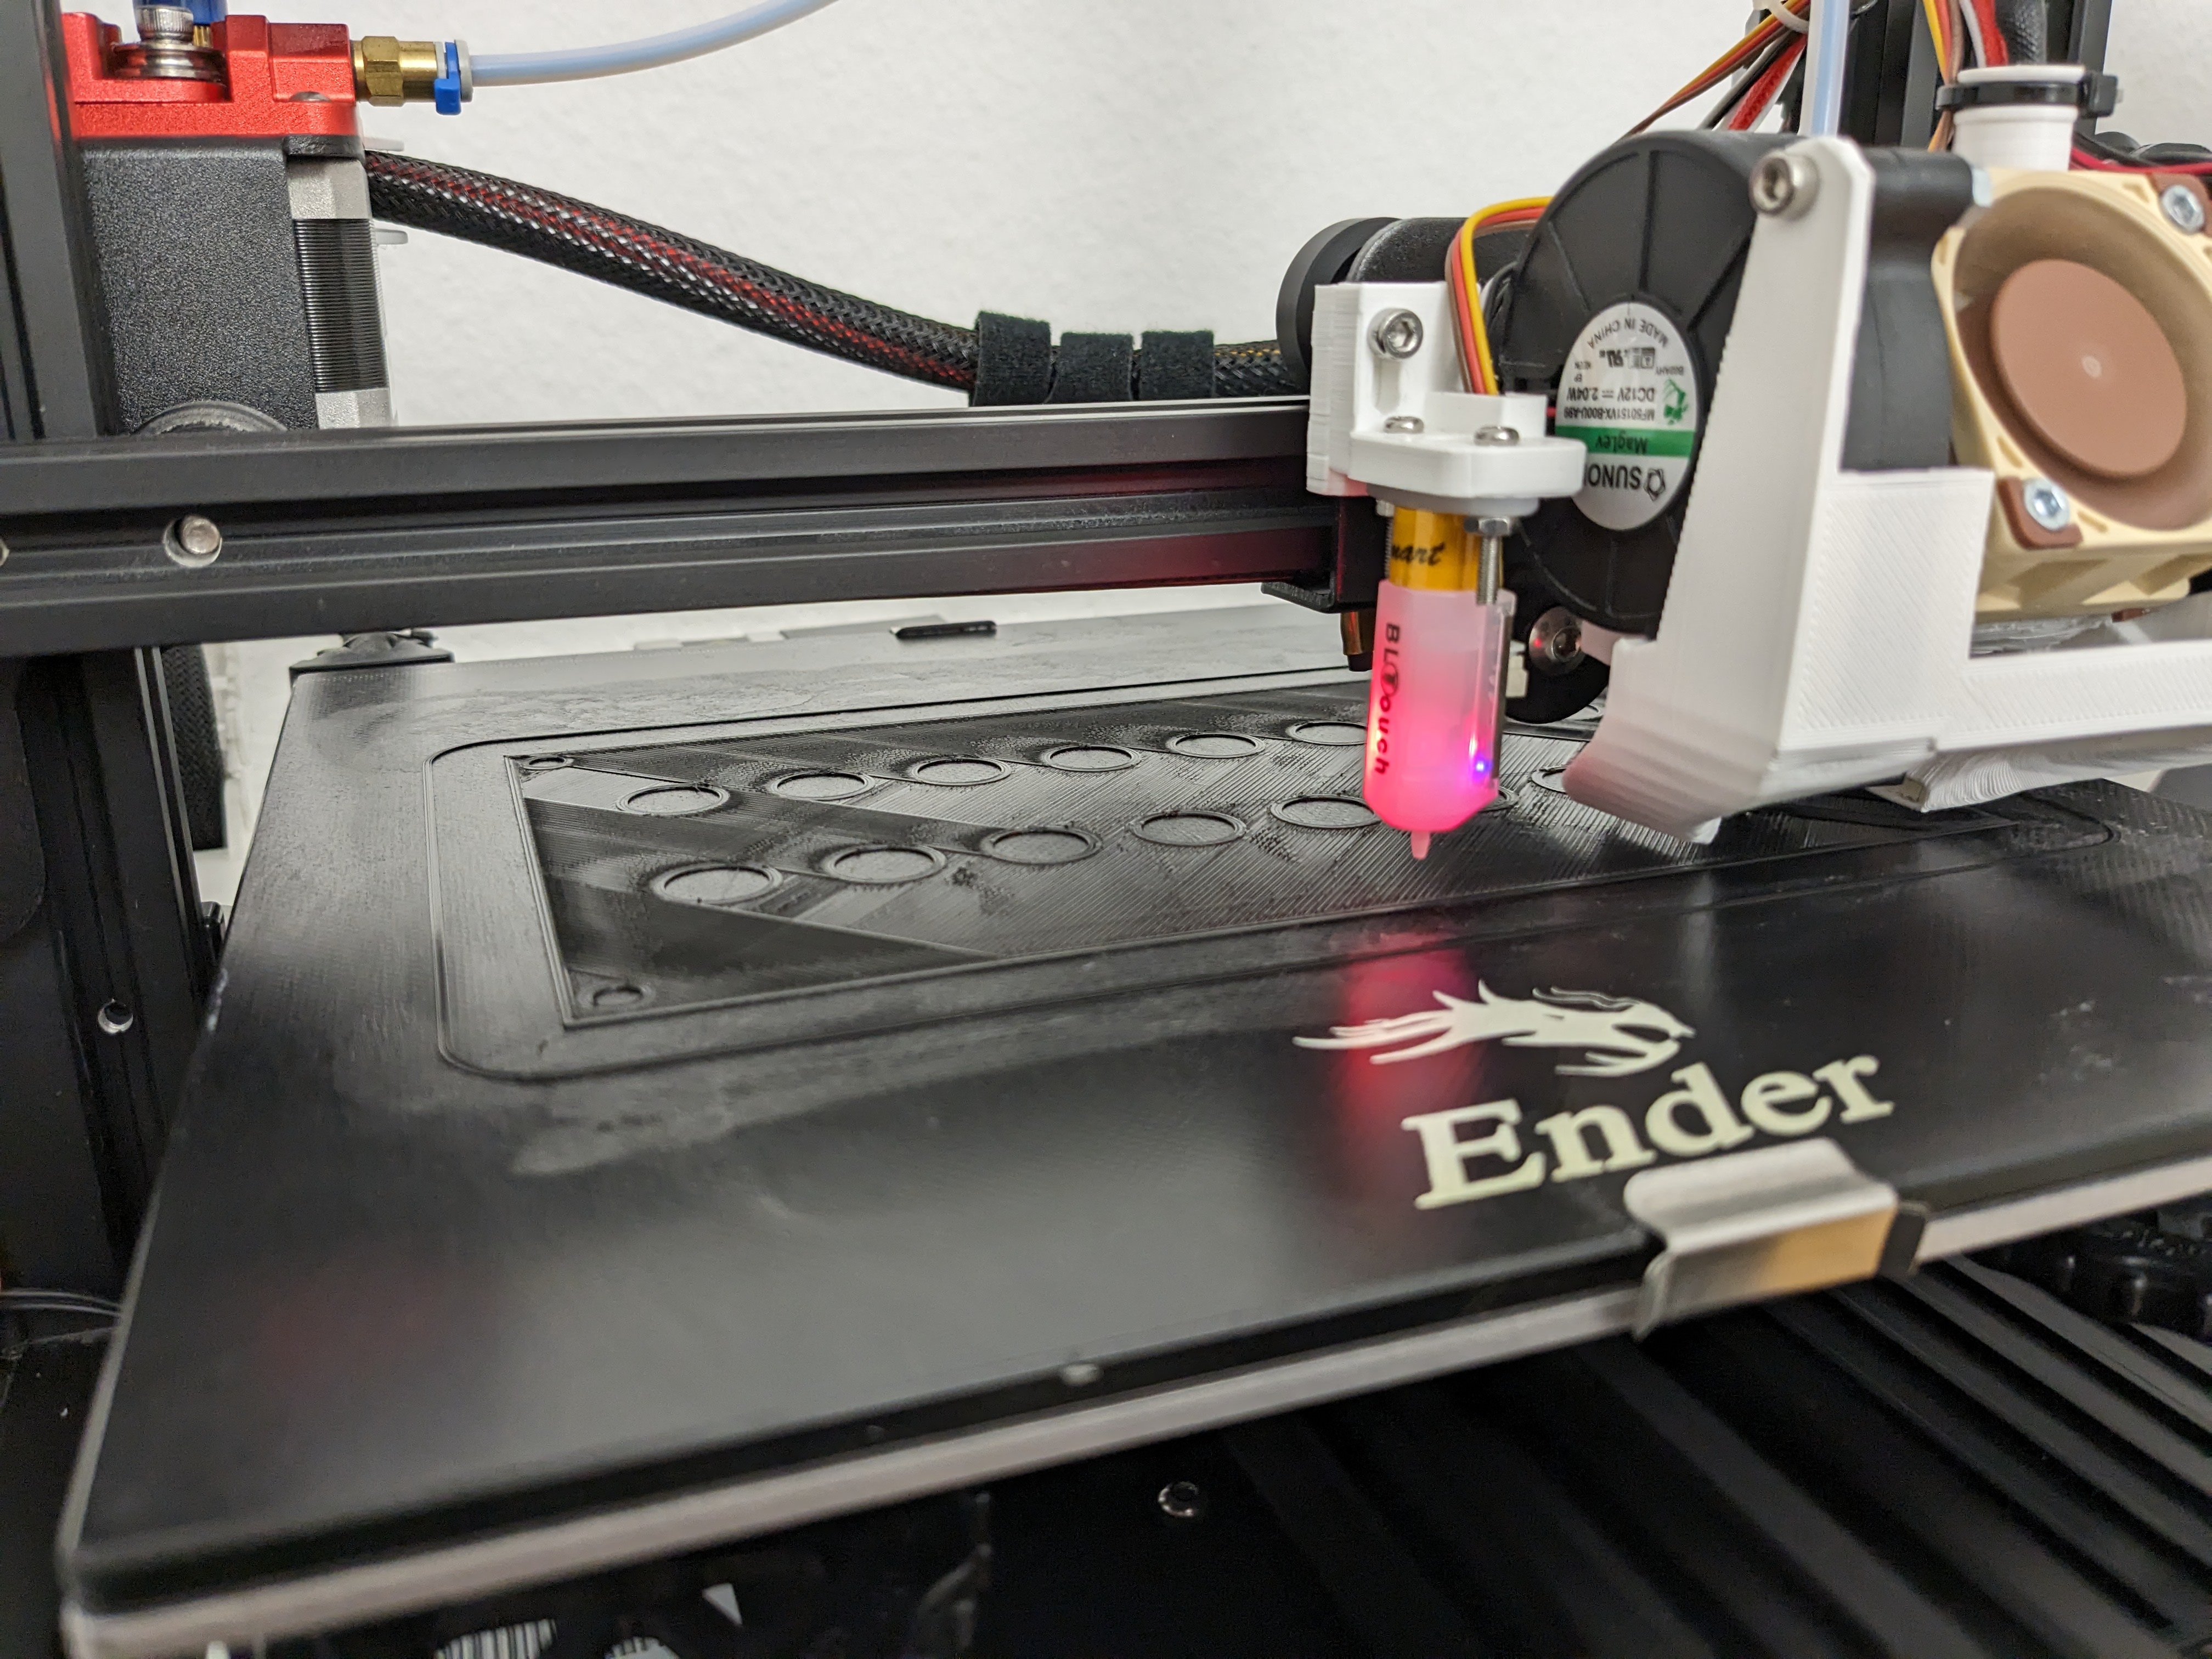
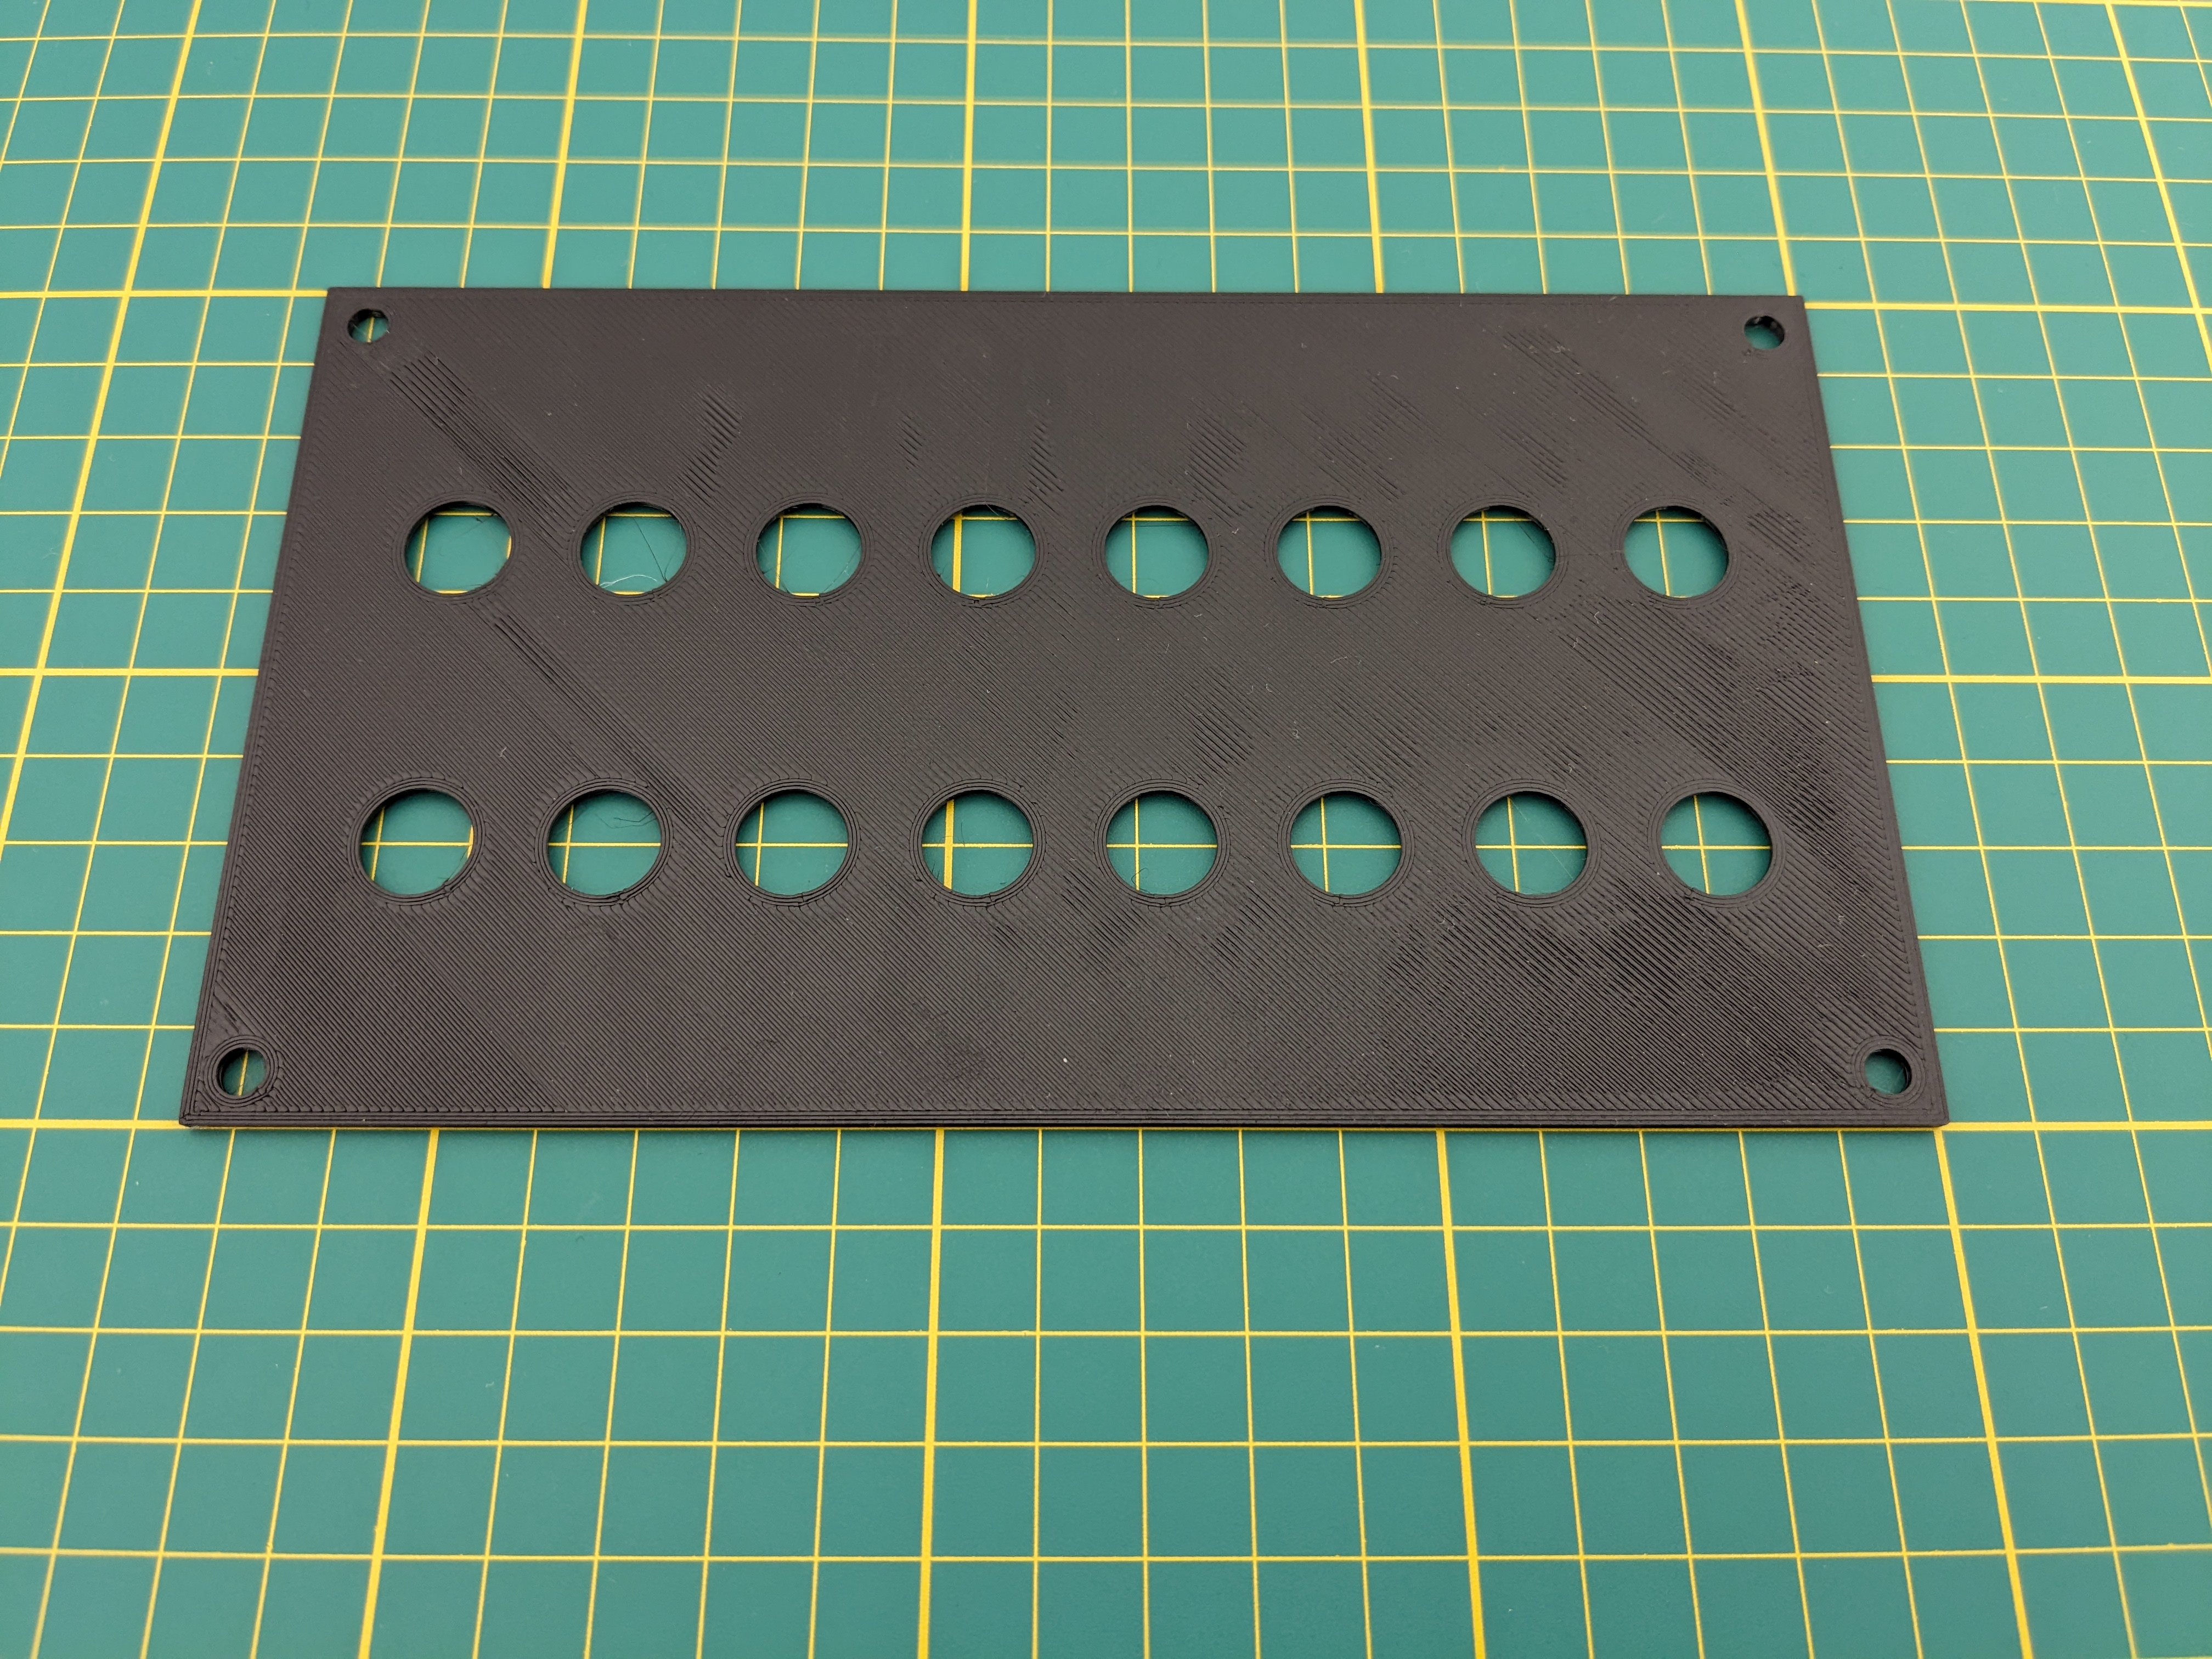
I used a case from Abox as the base and replaced the front panel with a 3D print. However, sooner or later I will replace this again with the supplied aluminum plate. It is simply more durable and withstands the mechanical load of the switches much better. To make the front a bit more visually appealing, I covered it with cut vinyl sheet, just like on the autopilot.
Here is a short demonstration of the current setup with autopilot and switch panel:
Switch Panel, demo video. Download: webm
Eventually, I decided to rebuild the first prototype of the switch panel and build another one in the progress. There were two reasons for this:
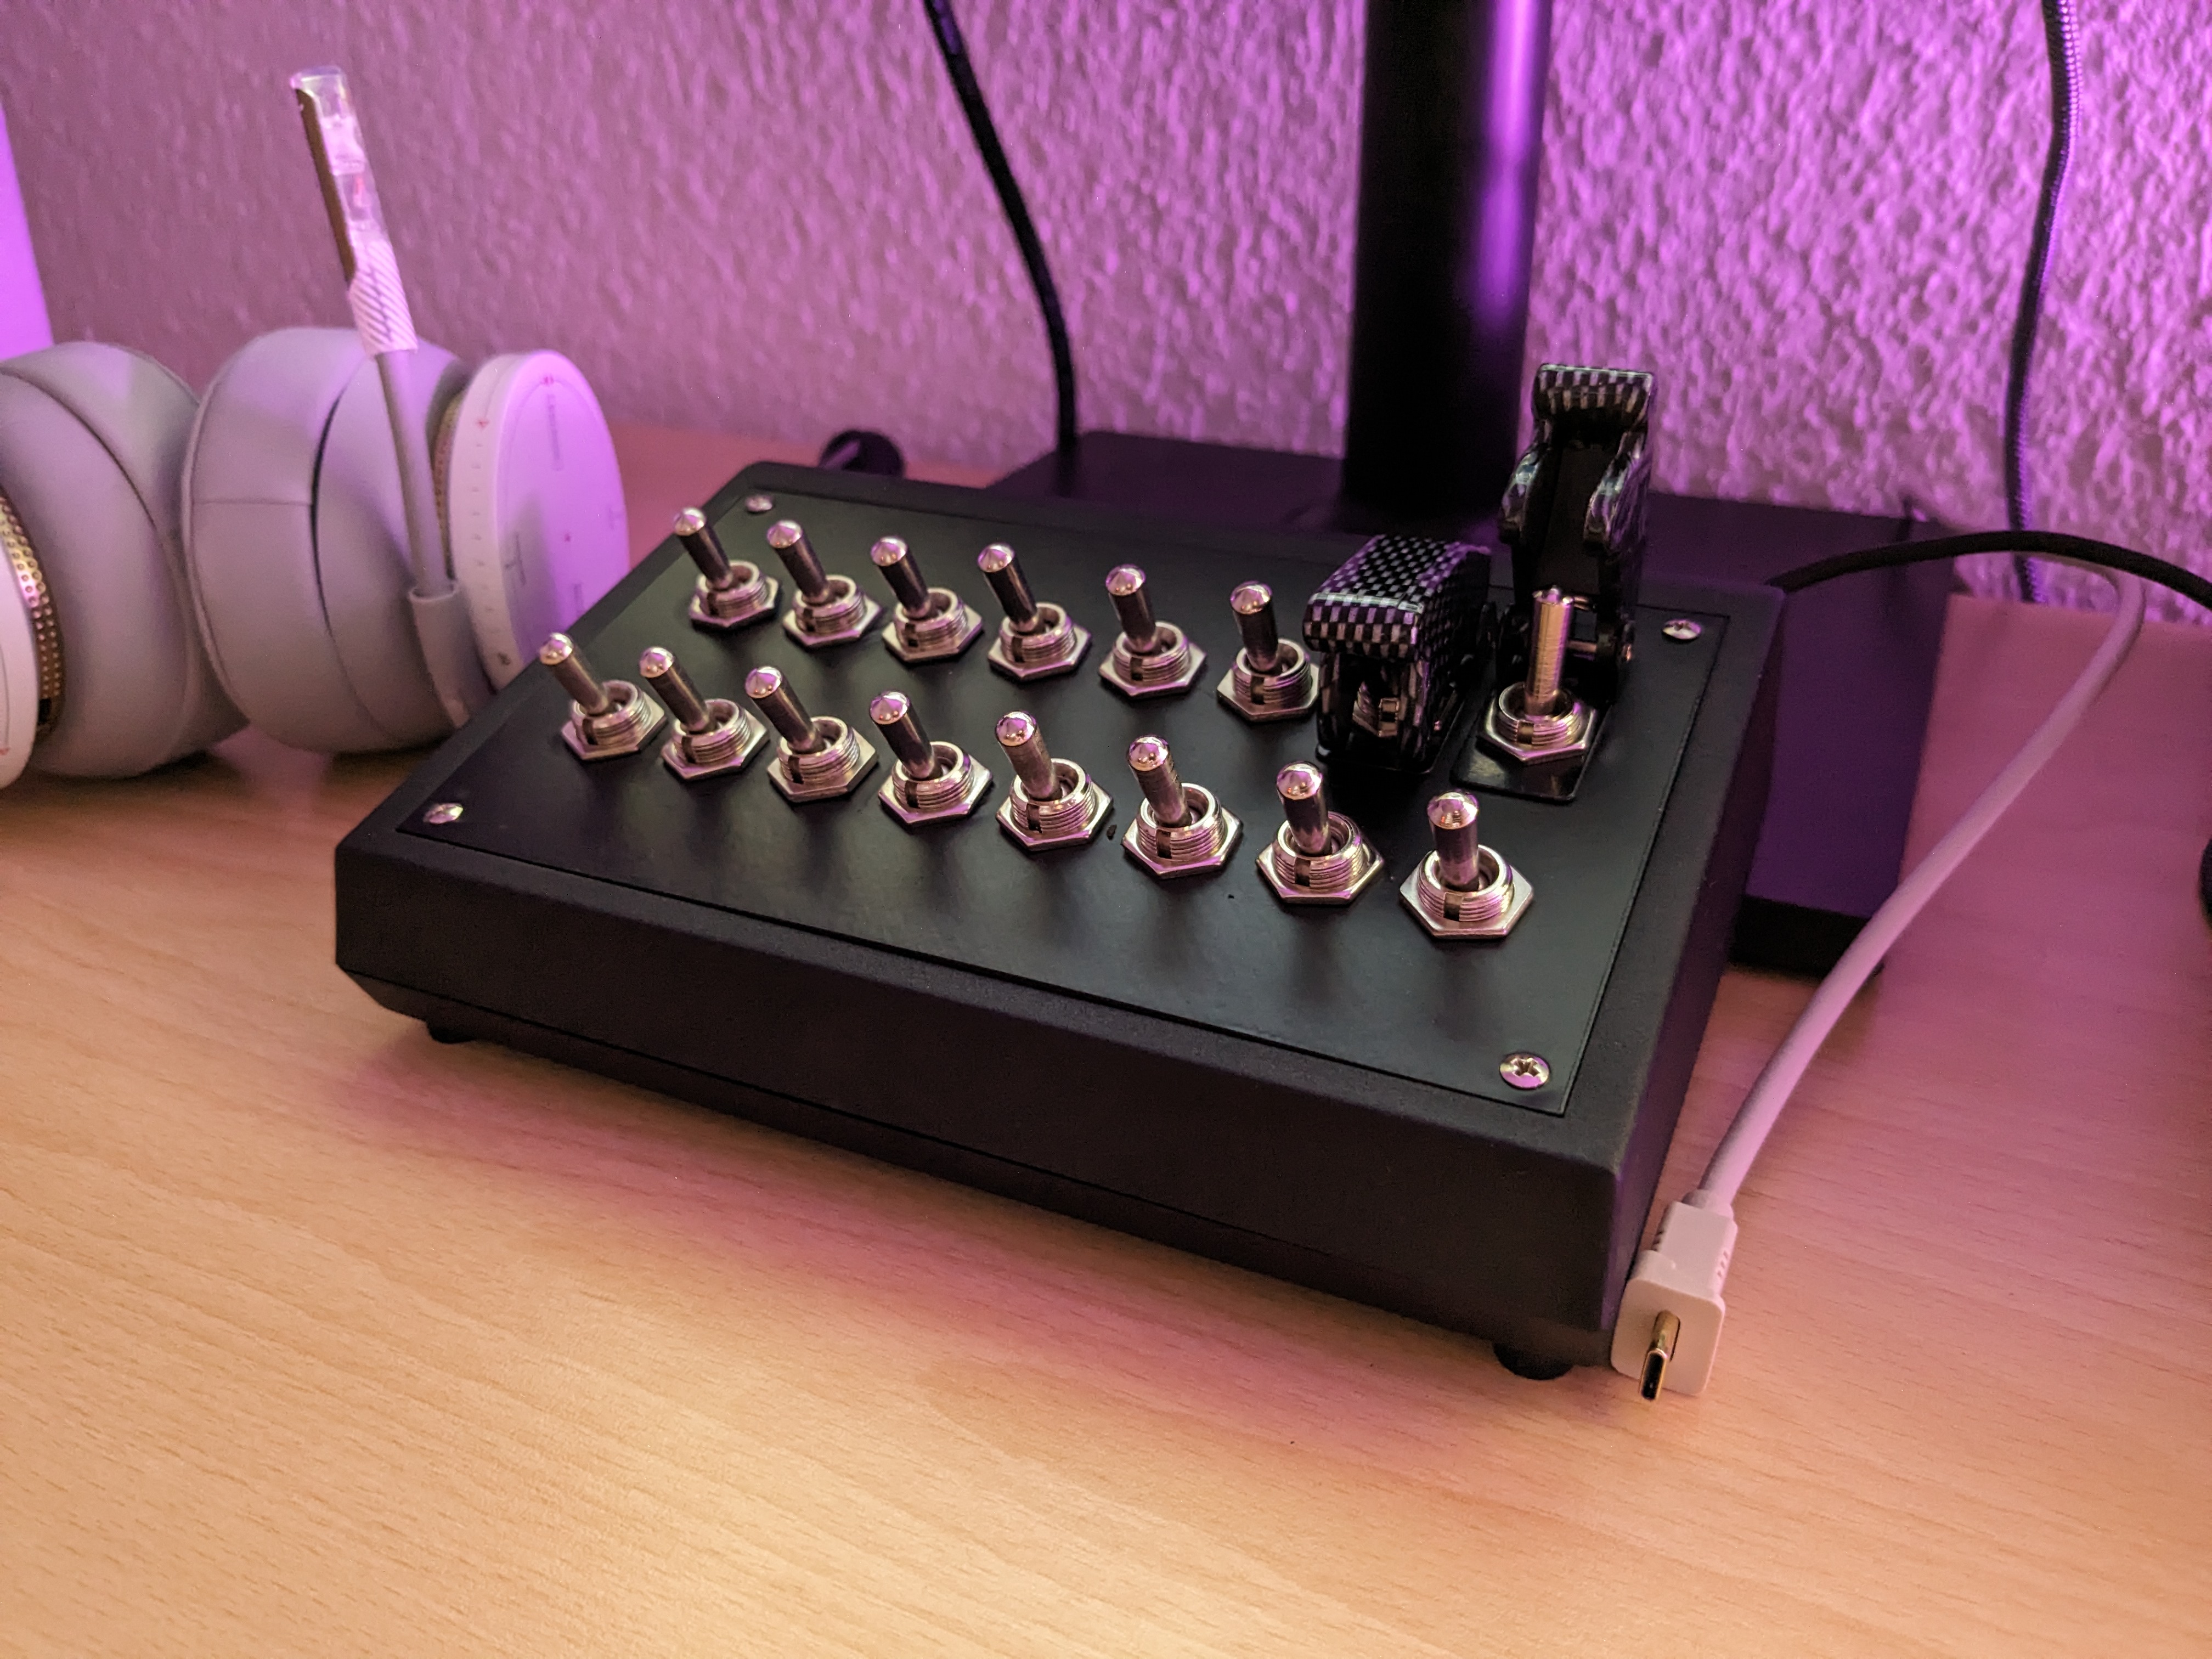
The solution to these problems was very simple. First, I replaced the front panel with the original aluminium front. At the time I developed the prototype, I just didn't have the necessary tools to machine them. The result looks much higher quality and more robust.
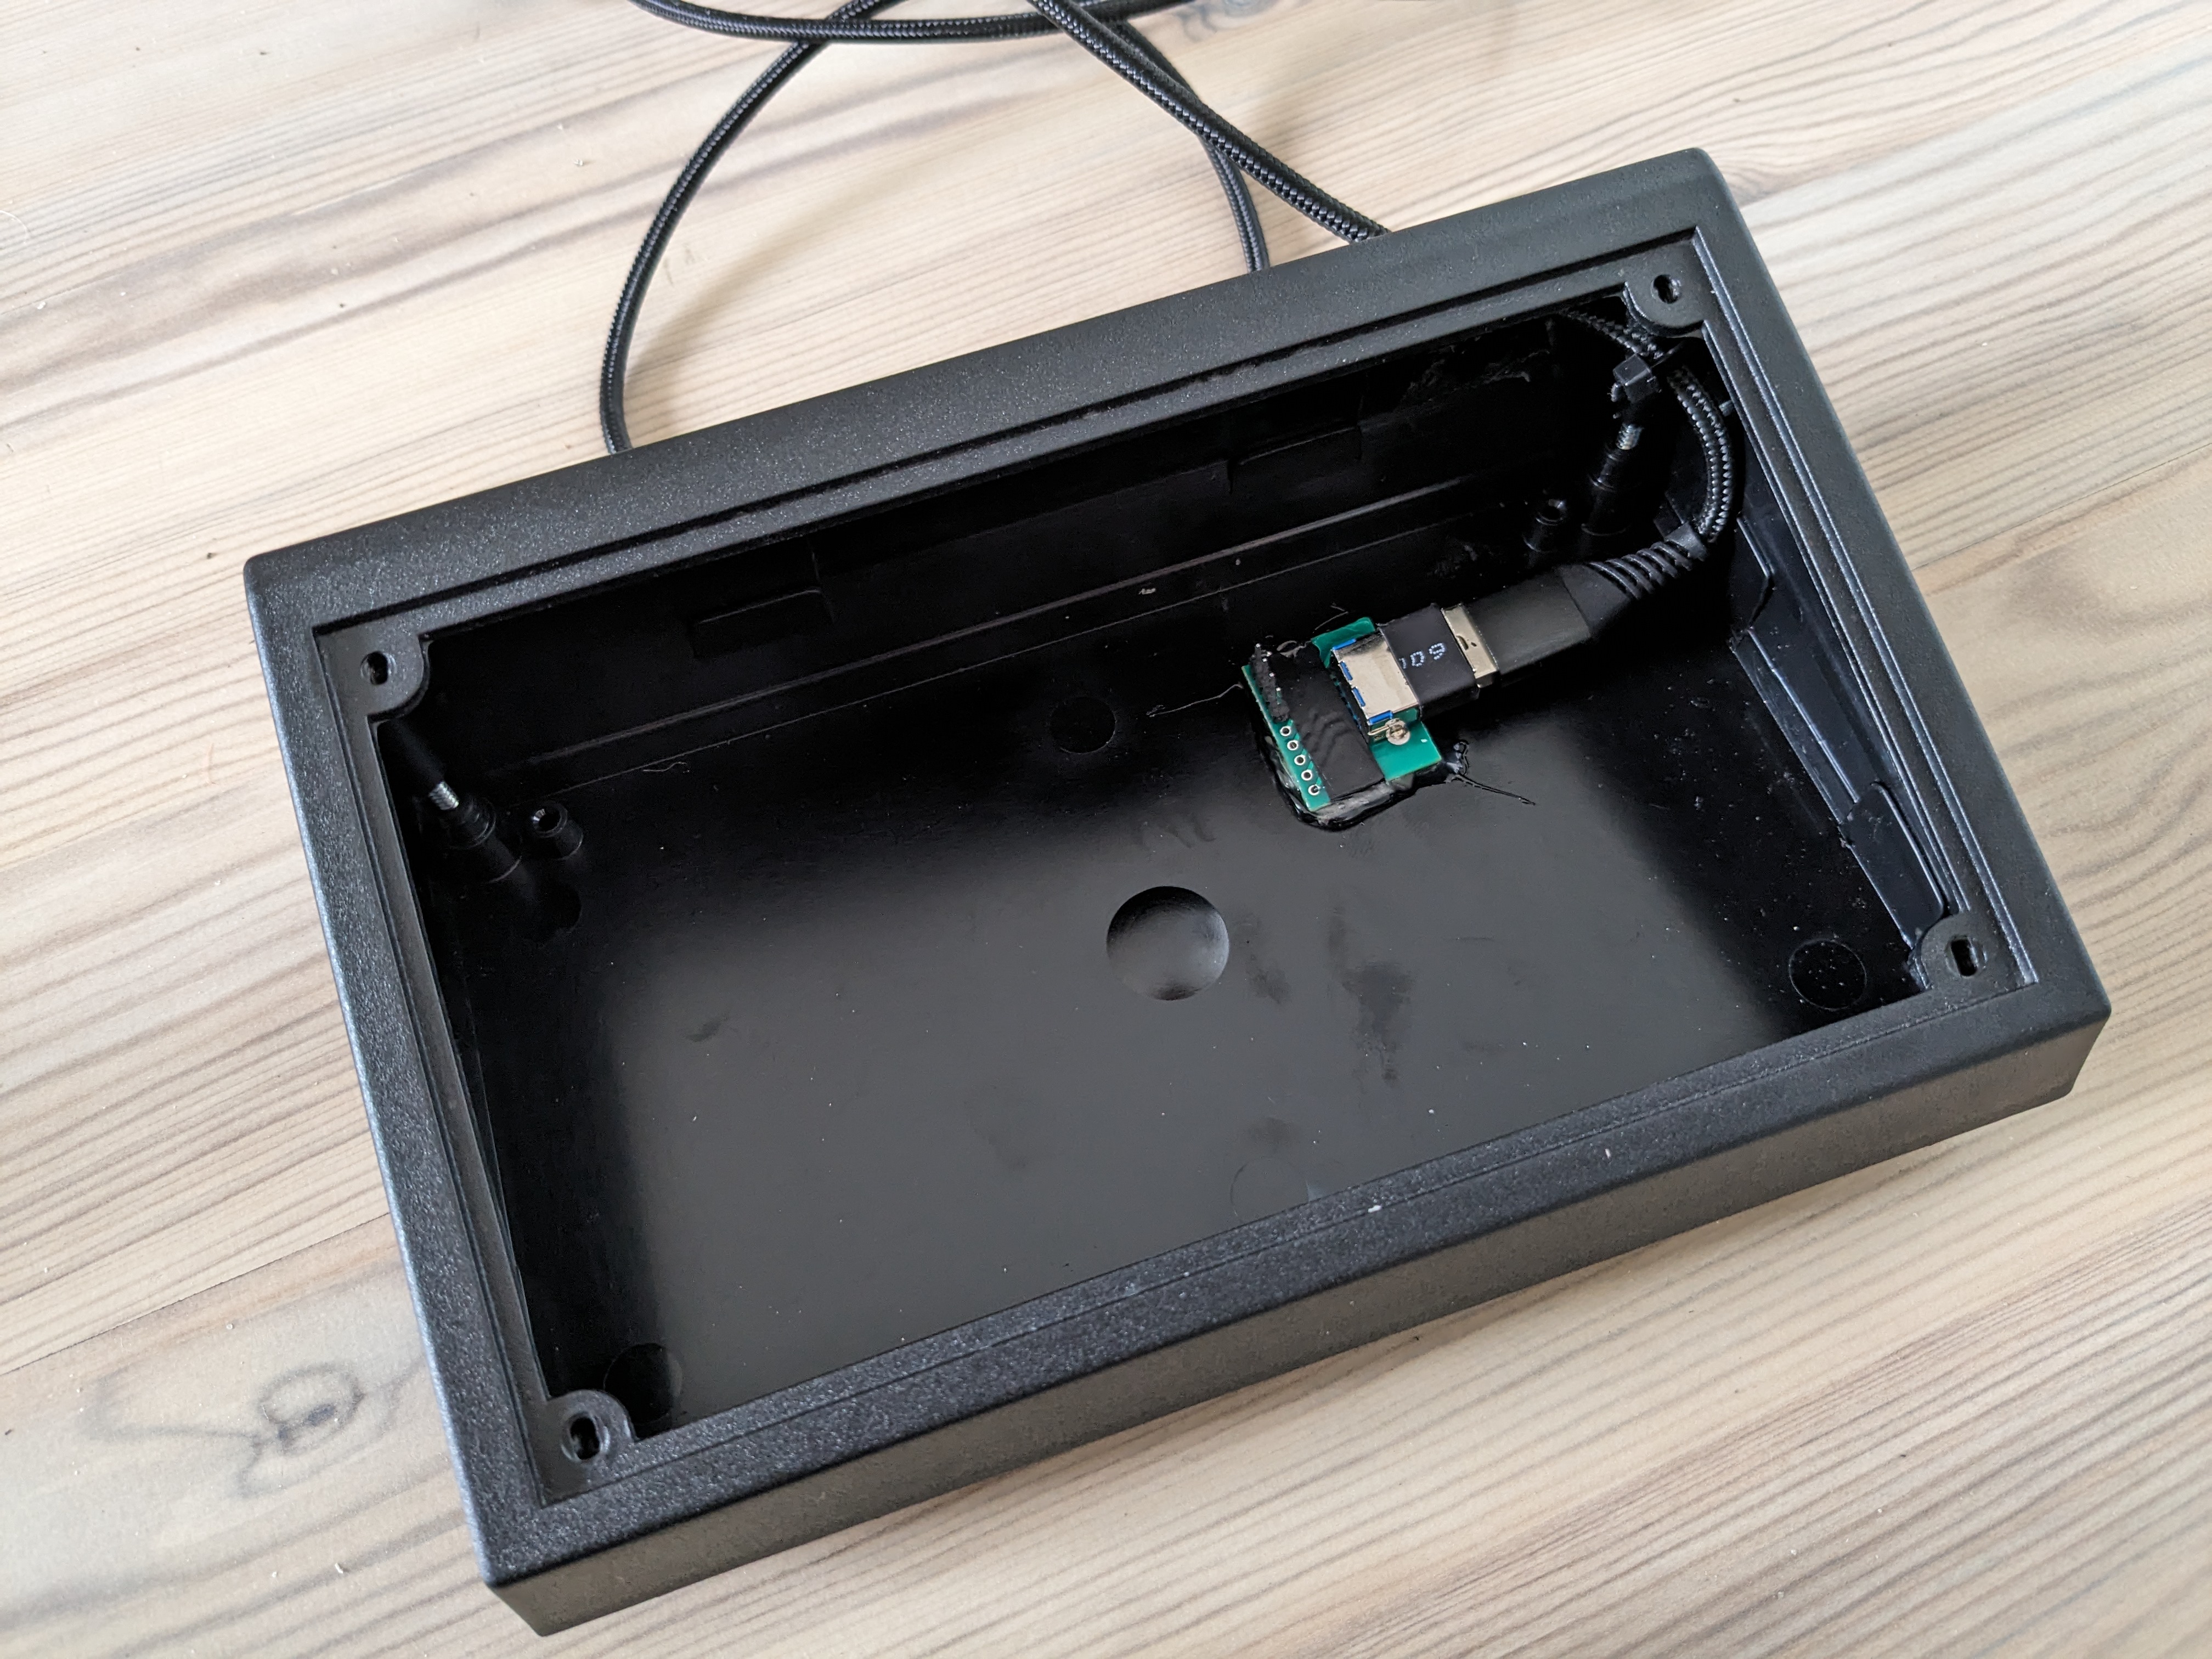
Secondly, I have placed a USB socket in the lower part of the housing. This decouples the switches from the enclosure and I can replace the cable in the future at my discretion. However, the USB cable does not serve as a real USB interface. I simply use the data lines of the cable for communication via I²C.
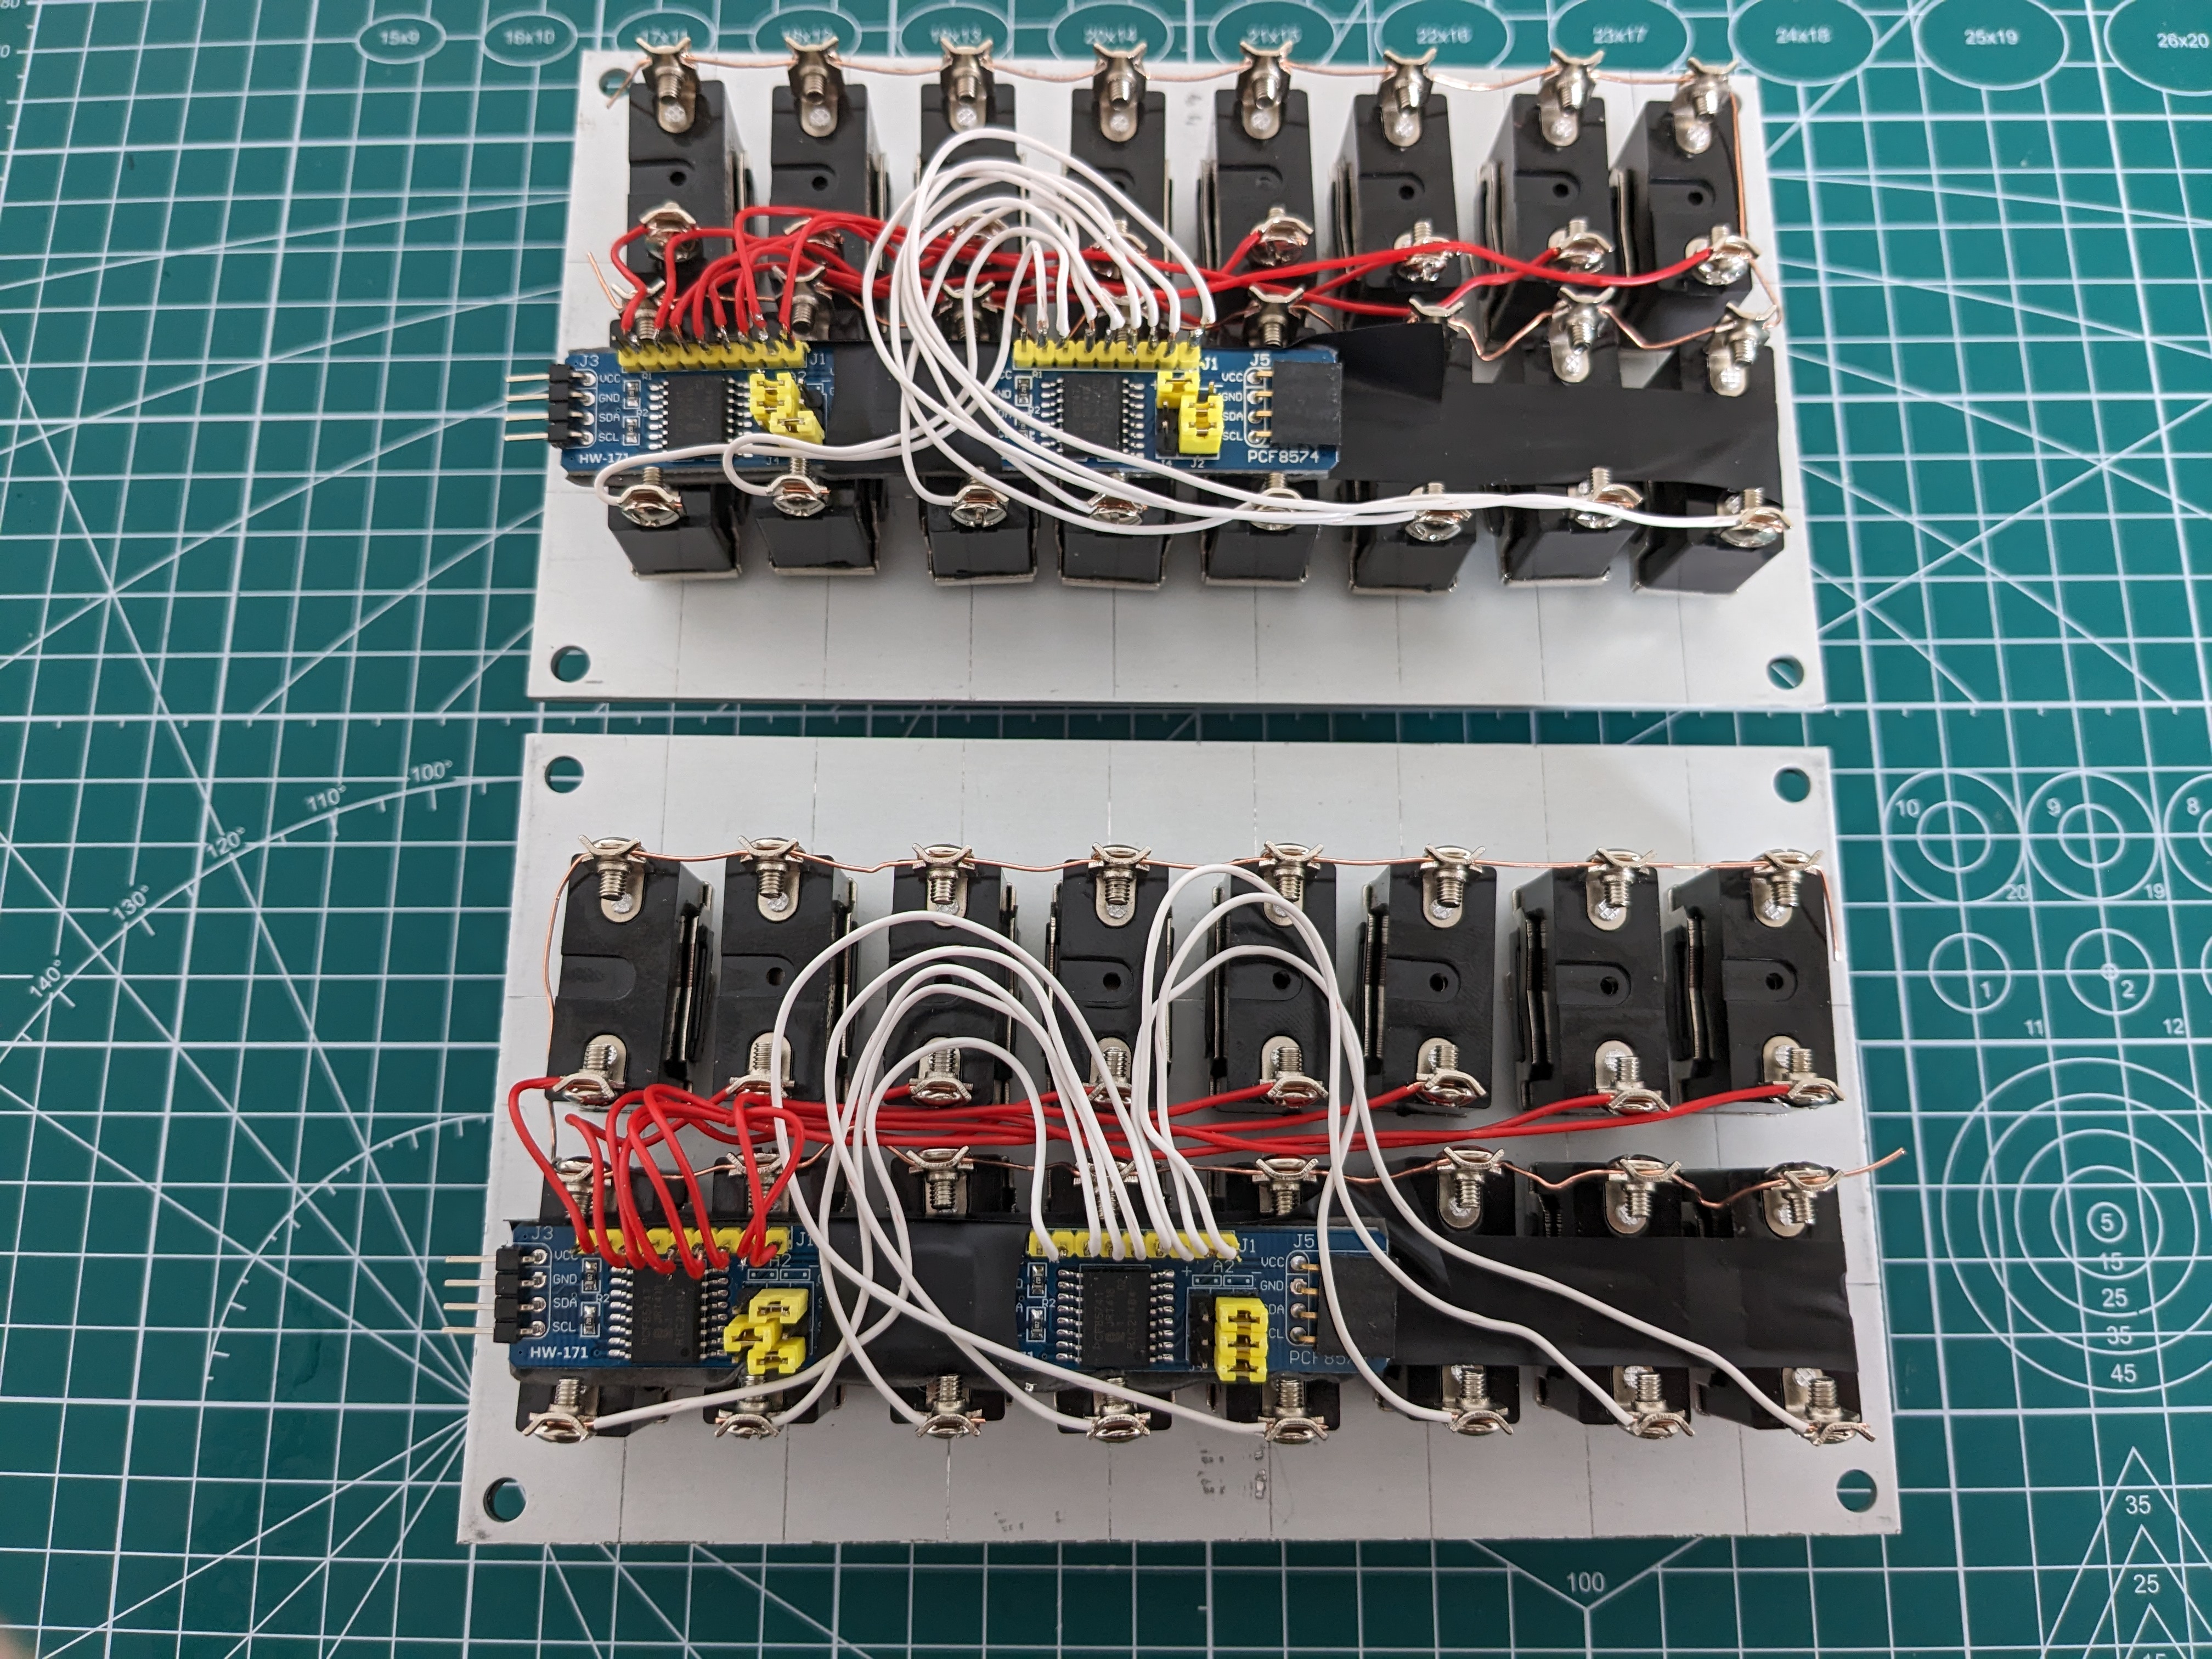
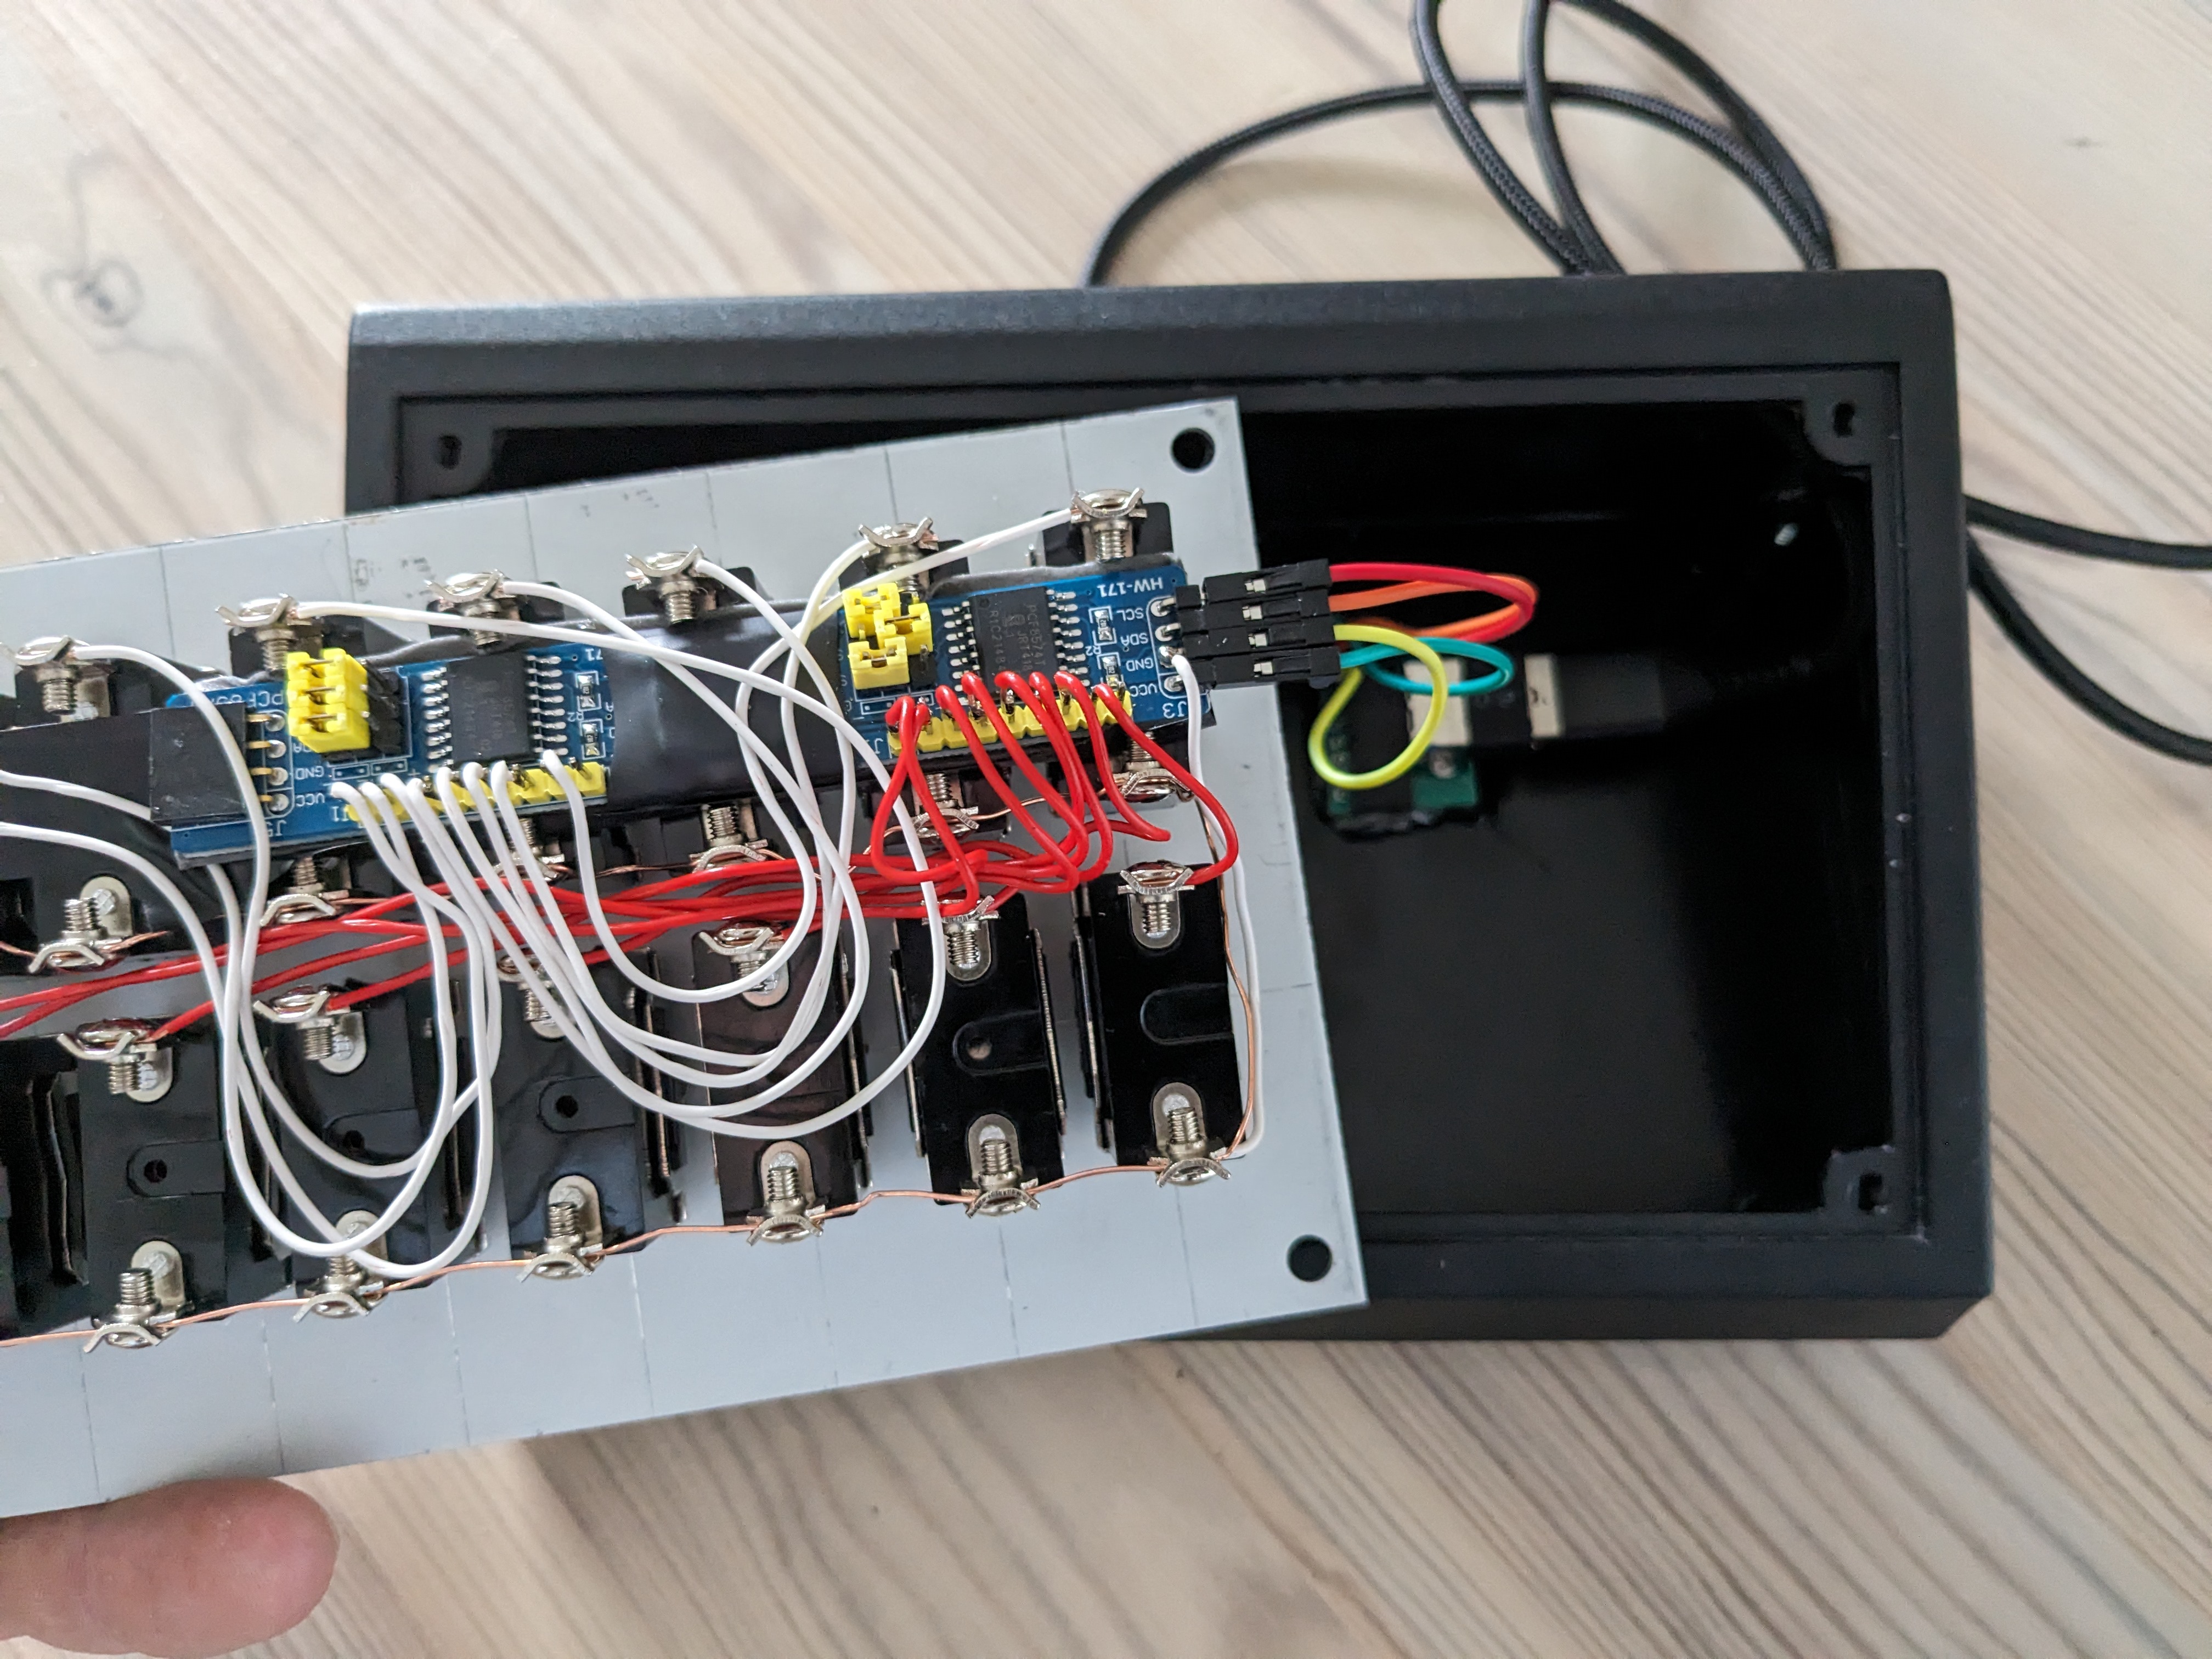
The result is two visually very appealing and robust switch panels with a total of 32 switches that only require two pins on the microcontroller:

For flight simulator enthusiasts, the Xbox Series S is an unbeatable alternative to a PC. Sure, there is no possibility to fly on networks like VATSIM as of today, but for all those who can live with this trade-off, I can highly recommend it. In addition, it hardly takes up any space and can be expanded with your own peripherals, relatively easily and inexpensively, due to its compatibility with the HID standard.
I am very happy with the results so far and I'm looking forward to adding more custom built hardware to the rig (which I will of course document in this article). More than anything though, I’m hoping that this way I’ll be able to create more interest in cockpit building, among Xbox users. Just be creative, look twice at dusty consumer electronics or mundane objects and think about how they could be integrated into a cockpit. You will suddenly see things around you from a completely new perspective and a little creativity provides seemingly endless possibilities. Happy hacking!
I hope you enjoyed this article. If not, let me know – I welcome constructive feedback to improve the quality of my content. If you are interested in flight simulation or if this article has piqued your interest, you are cordially invited to visit me online. Besides on the The Pilot Club, you can also find me on the cruiselevel.de Discord server, the German-speaking community around flight simulation. My Discord handle is mupf.dev.
I would like to thank salud, and also my friend Razvan, for all the time they spent proofreading this article. I really do appreciate it! Also, thanks to Nata, the plotter princess, for cutting all my front vinyls. They always fit perfectly.